
Let's take a look at how you can make use of Tinkerwell and Laravel 7 to consume HTTP APIs easily. As an example, we are going to use the Laravel Forge API.
You can find the API documentation here.
Making HTTP requests
Since Tinkerwell 2.3.0, the default application in Tinkerwell is running on Laravel 7. This allows us to make use of the new built-in HTTP client in Laravel 7, which makes it a lot more comfortable to perform HTTP requests.
In this example, I want to take a look at all my existing servers, using the API. Let's forget about authentication for a second and simply call the HTTP API to see what happens.
An example request could look like this:
Http::get('https://forge.laravel.com/api/v1/servers')
  ->body();
So all we do is perform a GET request on the URL https://forge.laravel.com/api/v1/servers and return the body. Here's how that looks like in Tinkerwell:
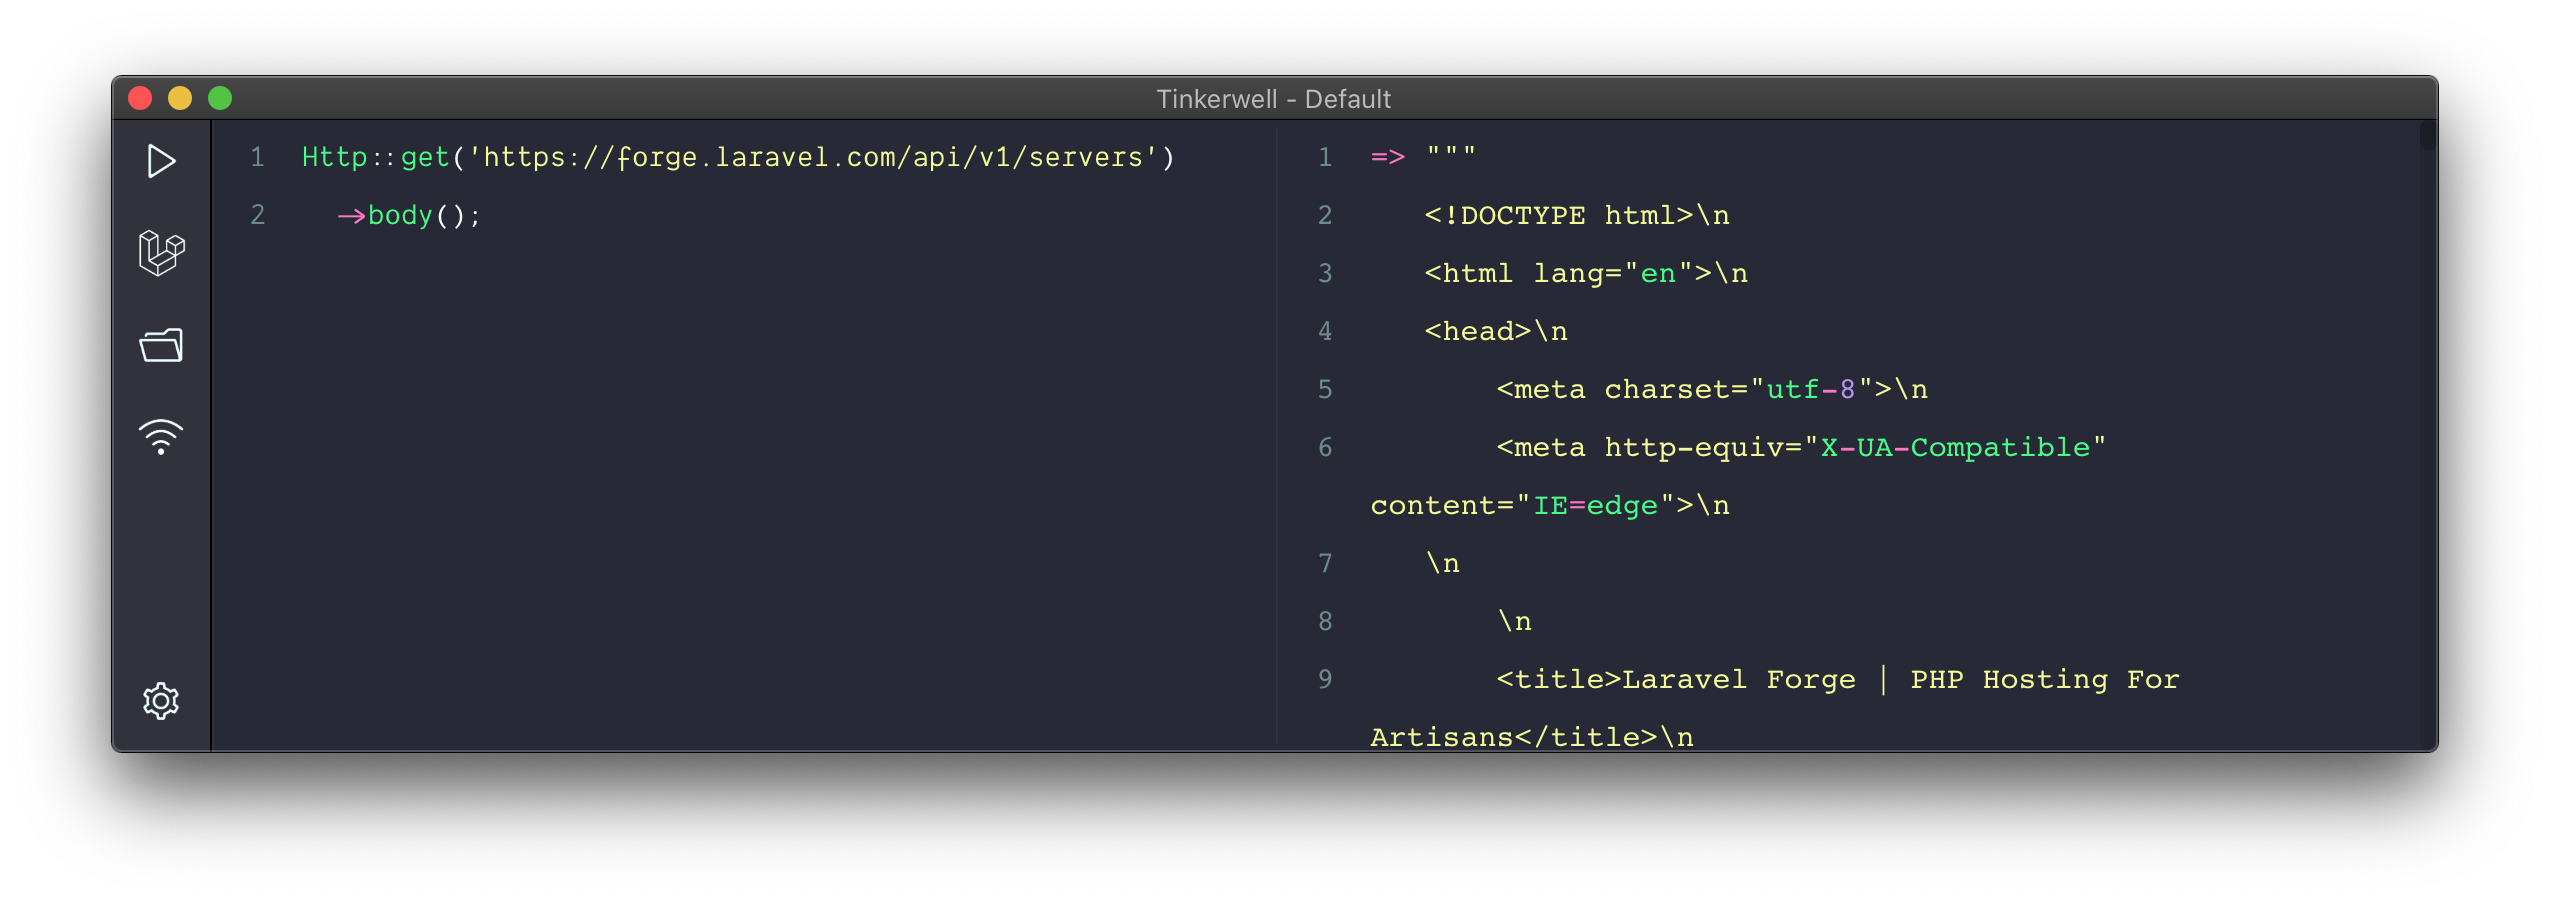
Huh, that's not what I expected. Why are we getting HTML instead of an "Unauthorized" error message? Let's inspect the HTTP status code using
Http::get('https://forge.laravel.com/api/v1/servers')
  ->status();
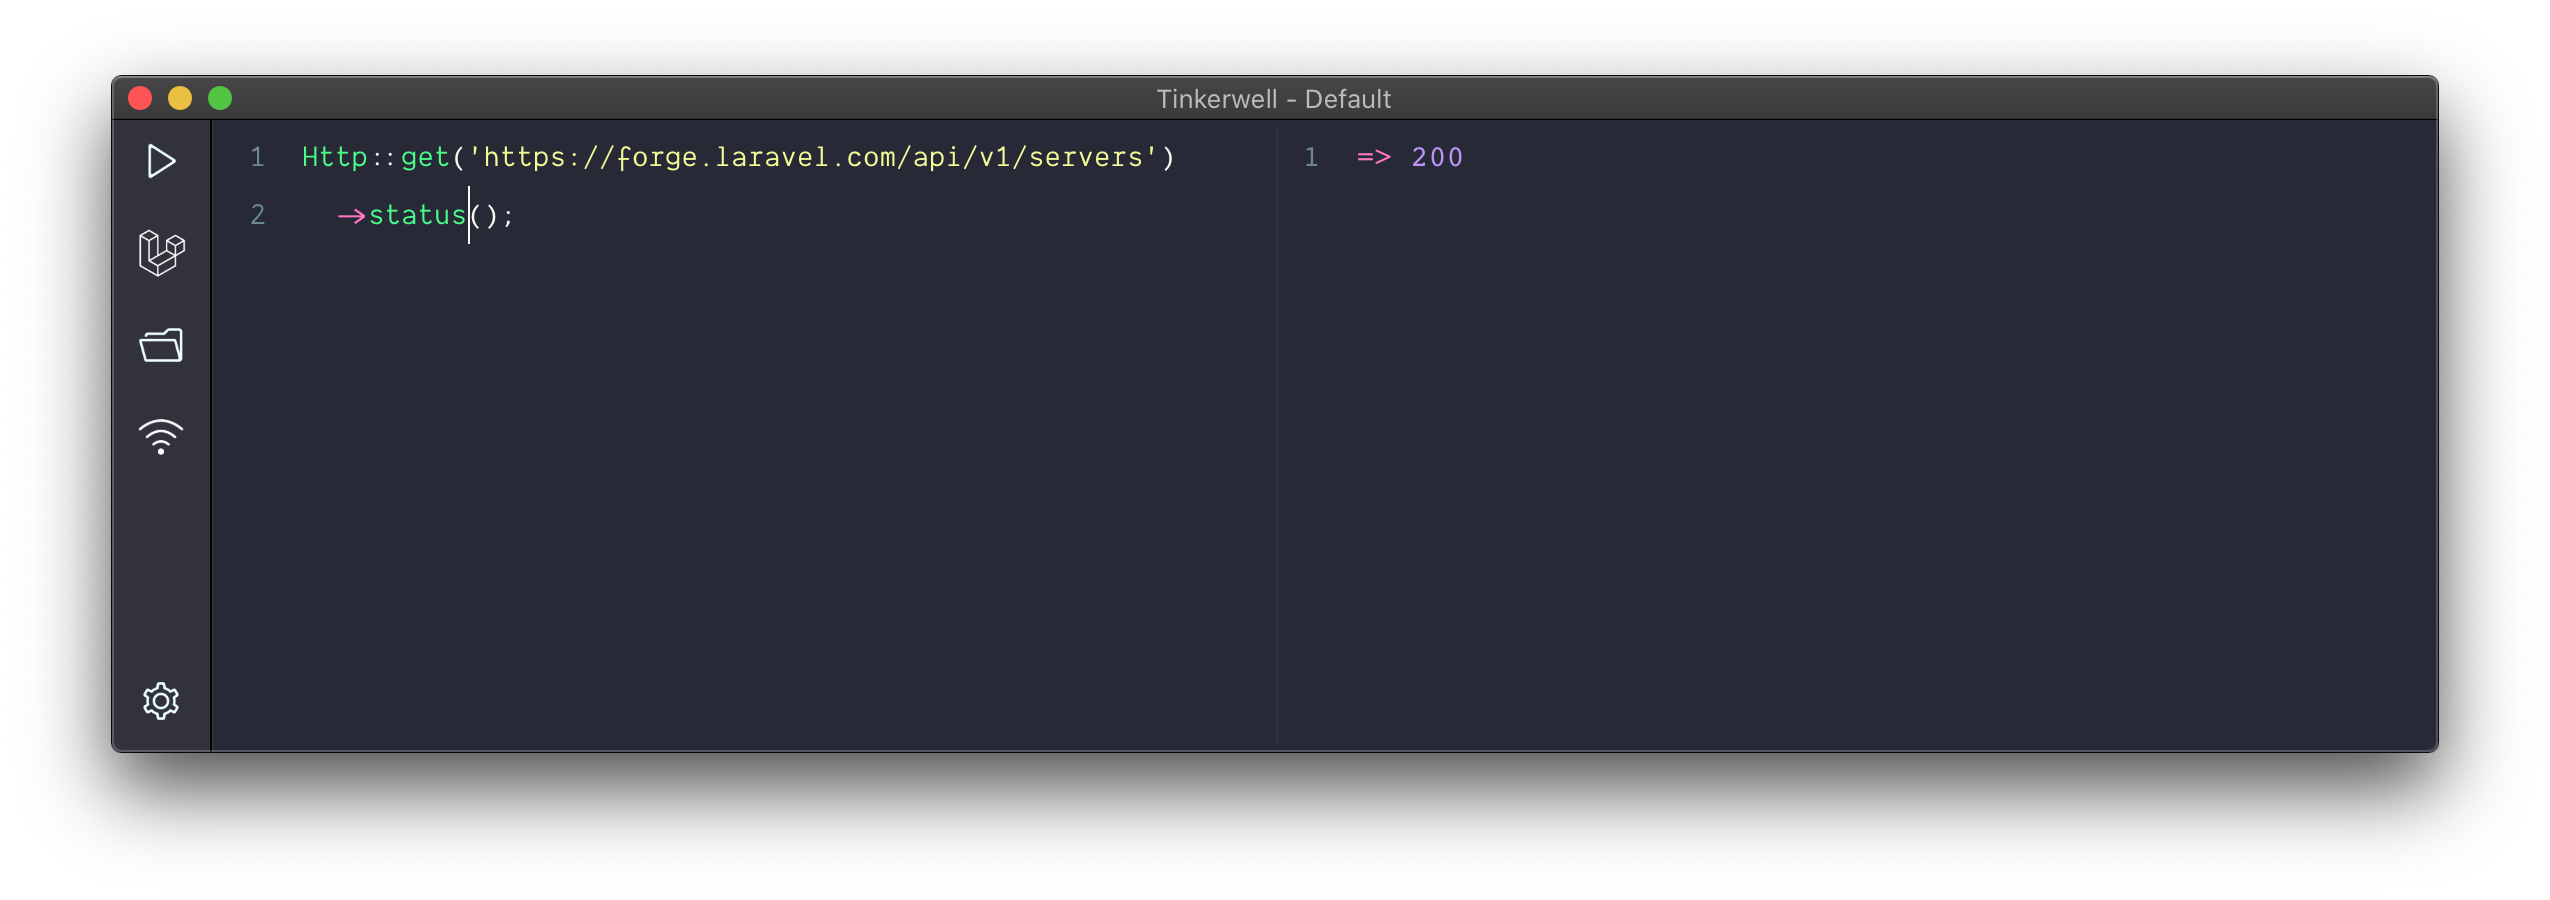
So we get a status 200 response, but clearly this is HTML that we receive - not a JSON response.
And that's exactly the error in this case. We need to tell the API endpoint that we want it to return JSON to us. Let's add an Accept header and try again:
Http::withHeaders([
    'accept' => 'application/json'
  ])
  ->get('https://forge.laravel.com/api/v1/servers')
  ->body();
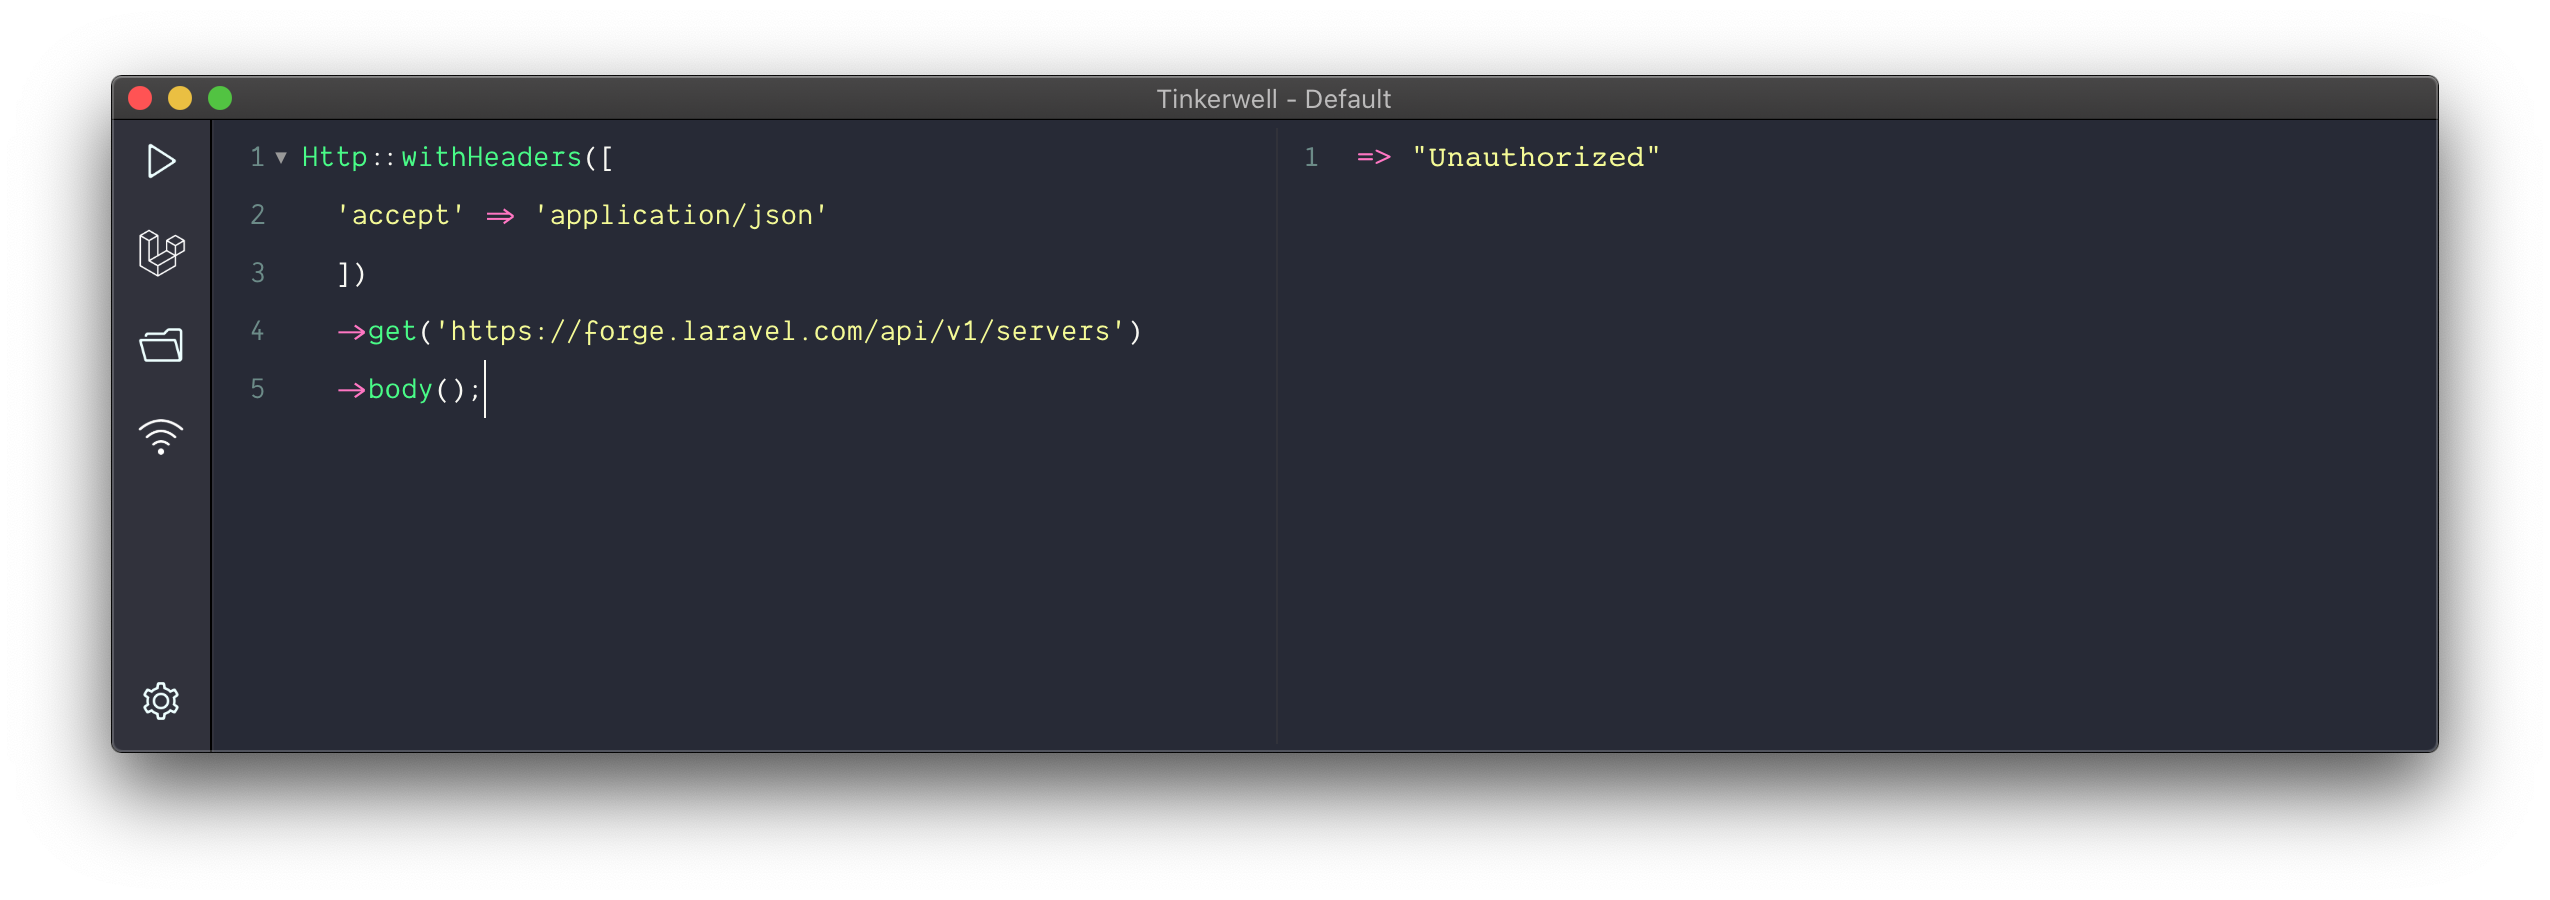
Aha! There we go. Now we tell the API endpoint that we want it to return JSON and we see that the HTTP request is unauthorized.
Authentication
To authenticate our requests, the Forge API requires us to add an Authorization header that includes our API key.
We could use the withHeaders method to just add the Authorization header ourselves, but Laravel makes this a bit easier for us. All we need to do is use the withToken method and give it our API key. And since we know that the API is going to return JSON, we will use the json method instead of receiving the raw body.
Here's how that looks like:
Http::withHeaders([
  	'accept' => 'application/json'
  ])
  ->withToken($apiKey)
  ->get('https://forge.laravel.com/api/v1/servers')
  ->json();
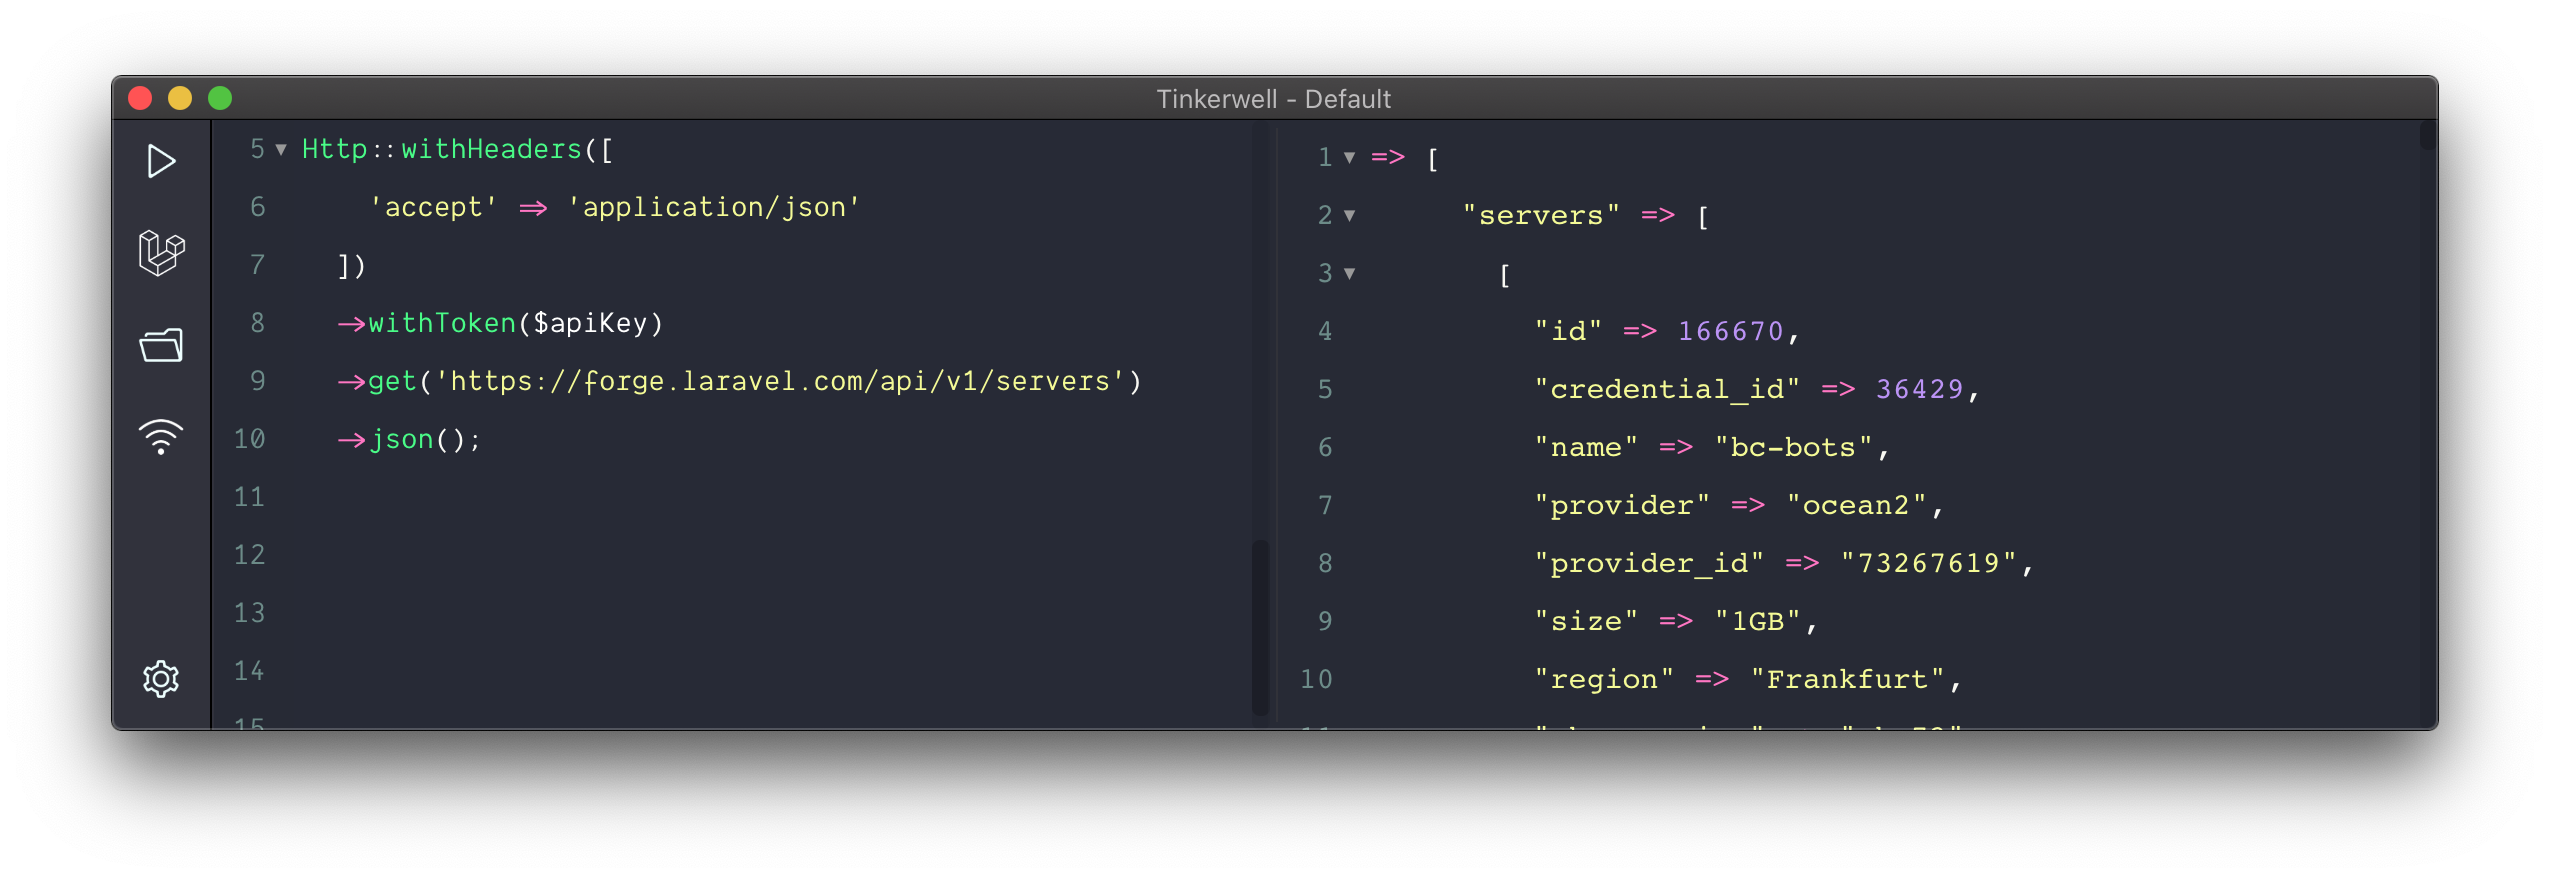
And now we get the API response. Since we're using Tinkerwell, we can now work with the response data in any way we want.
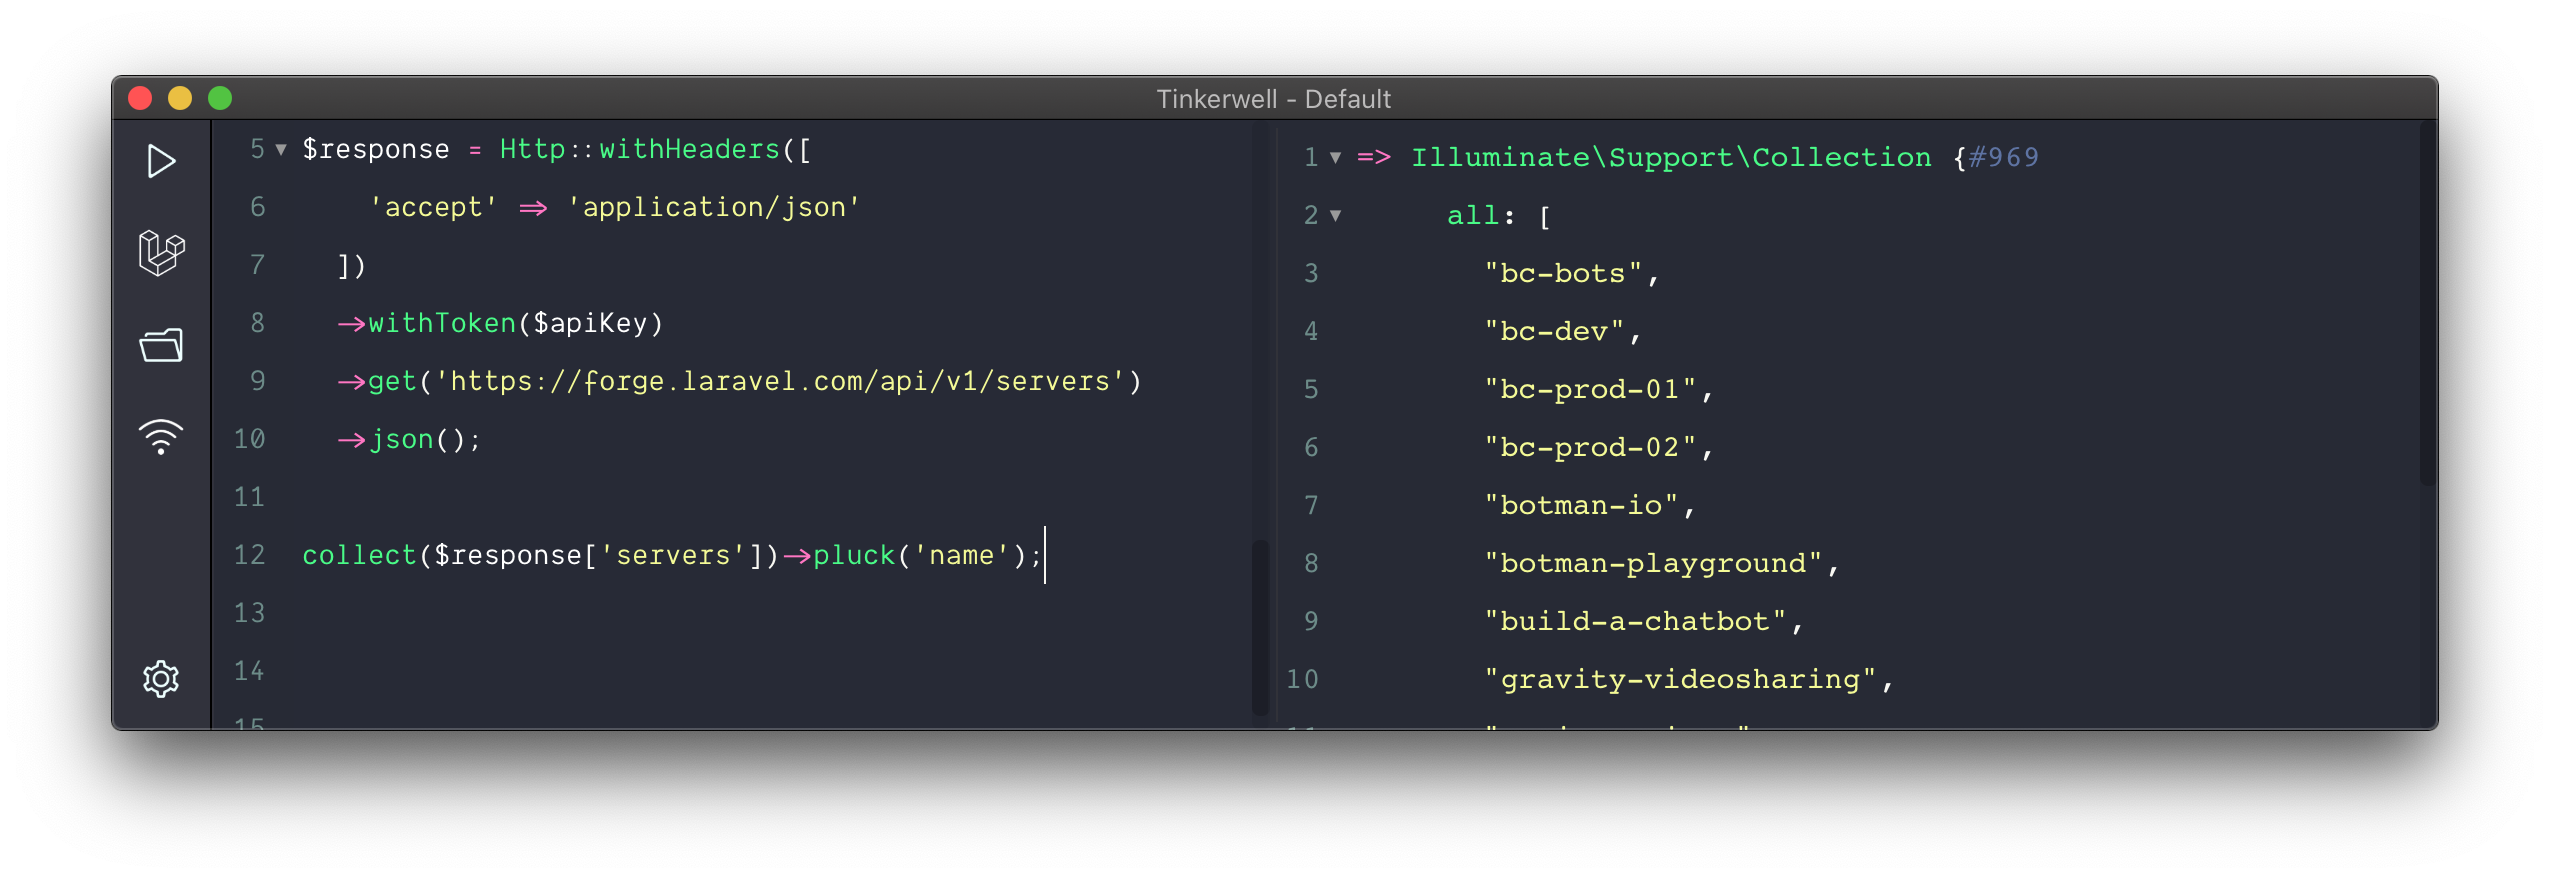
Let's display a list of all server names for example:
$response = Http::withHeaders([
  	'accept' => 'application/json'
  ])
  ->withToken($apiKey)
  ->get('https://forge.laravel.com/api/v1/servers')
  ->json();

collect($response['servers'])->pluck('name');
Okay, cool. So working with our response data is really easy now. But with the new table-view that was added in Tinkerwell 2.3.0, we can even look at our data in a more structured way. You can switch to the new table view by pressing CMD (or Ctrl)+Shift+T.
The table view is going to display any array or collection data, so let's change our code so that we only display the servers that we receive from the API:
$response = Http::withHeaders([
  	'accept' => 'application/json'
  ])
  ->withToken($apiKey)
  ->get('https://forge.laravel.com/api/v1/servers')
  ->json();

$response['servers']
If we now run this code in our table view, this is what it'll look like:
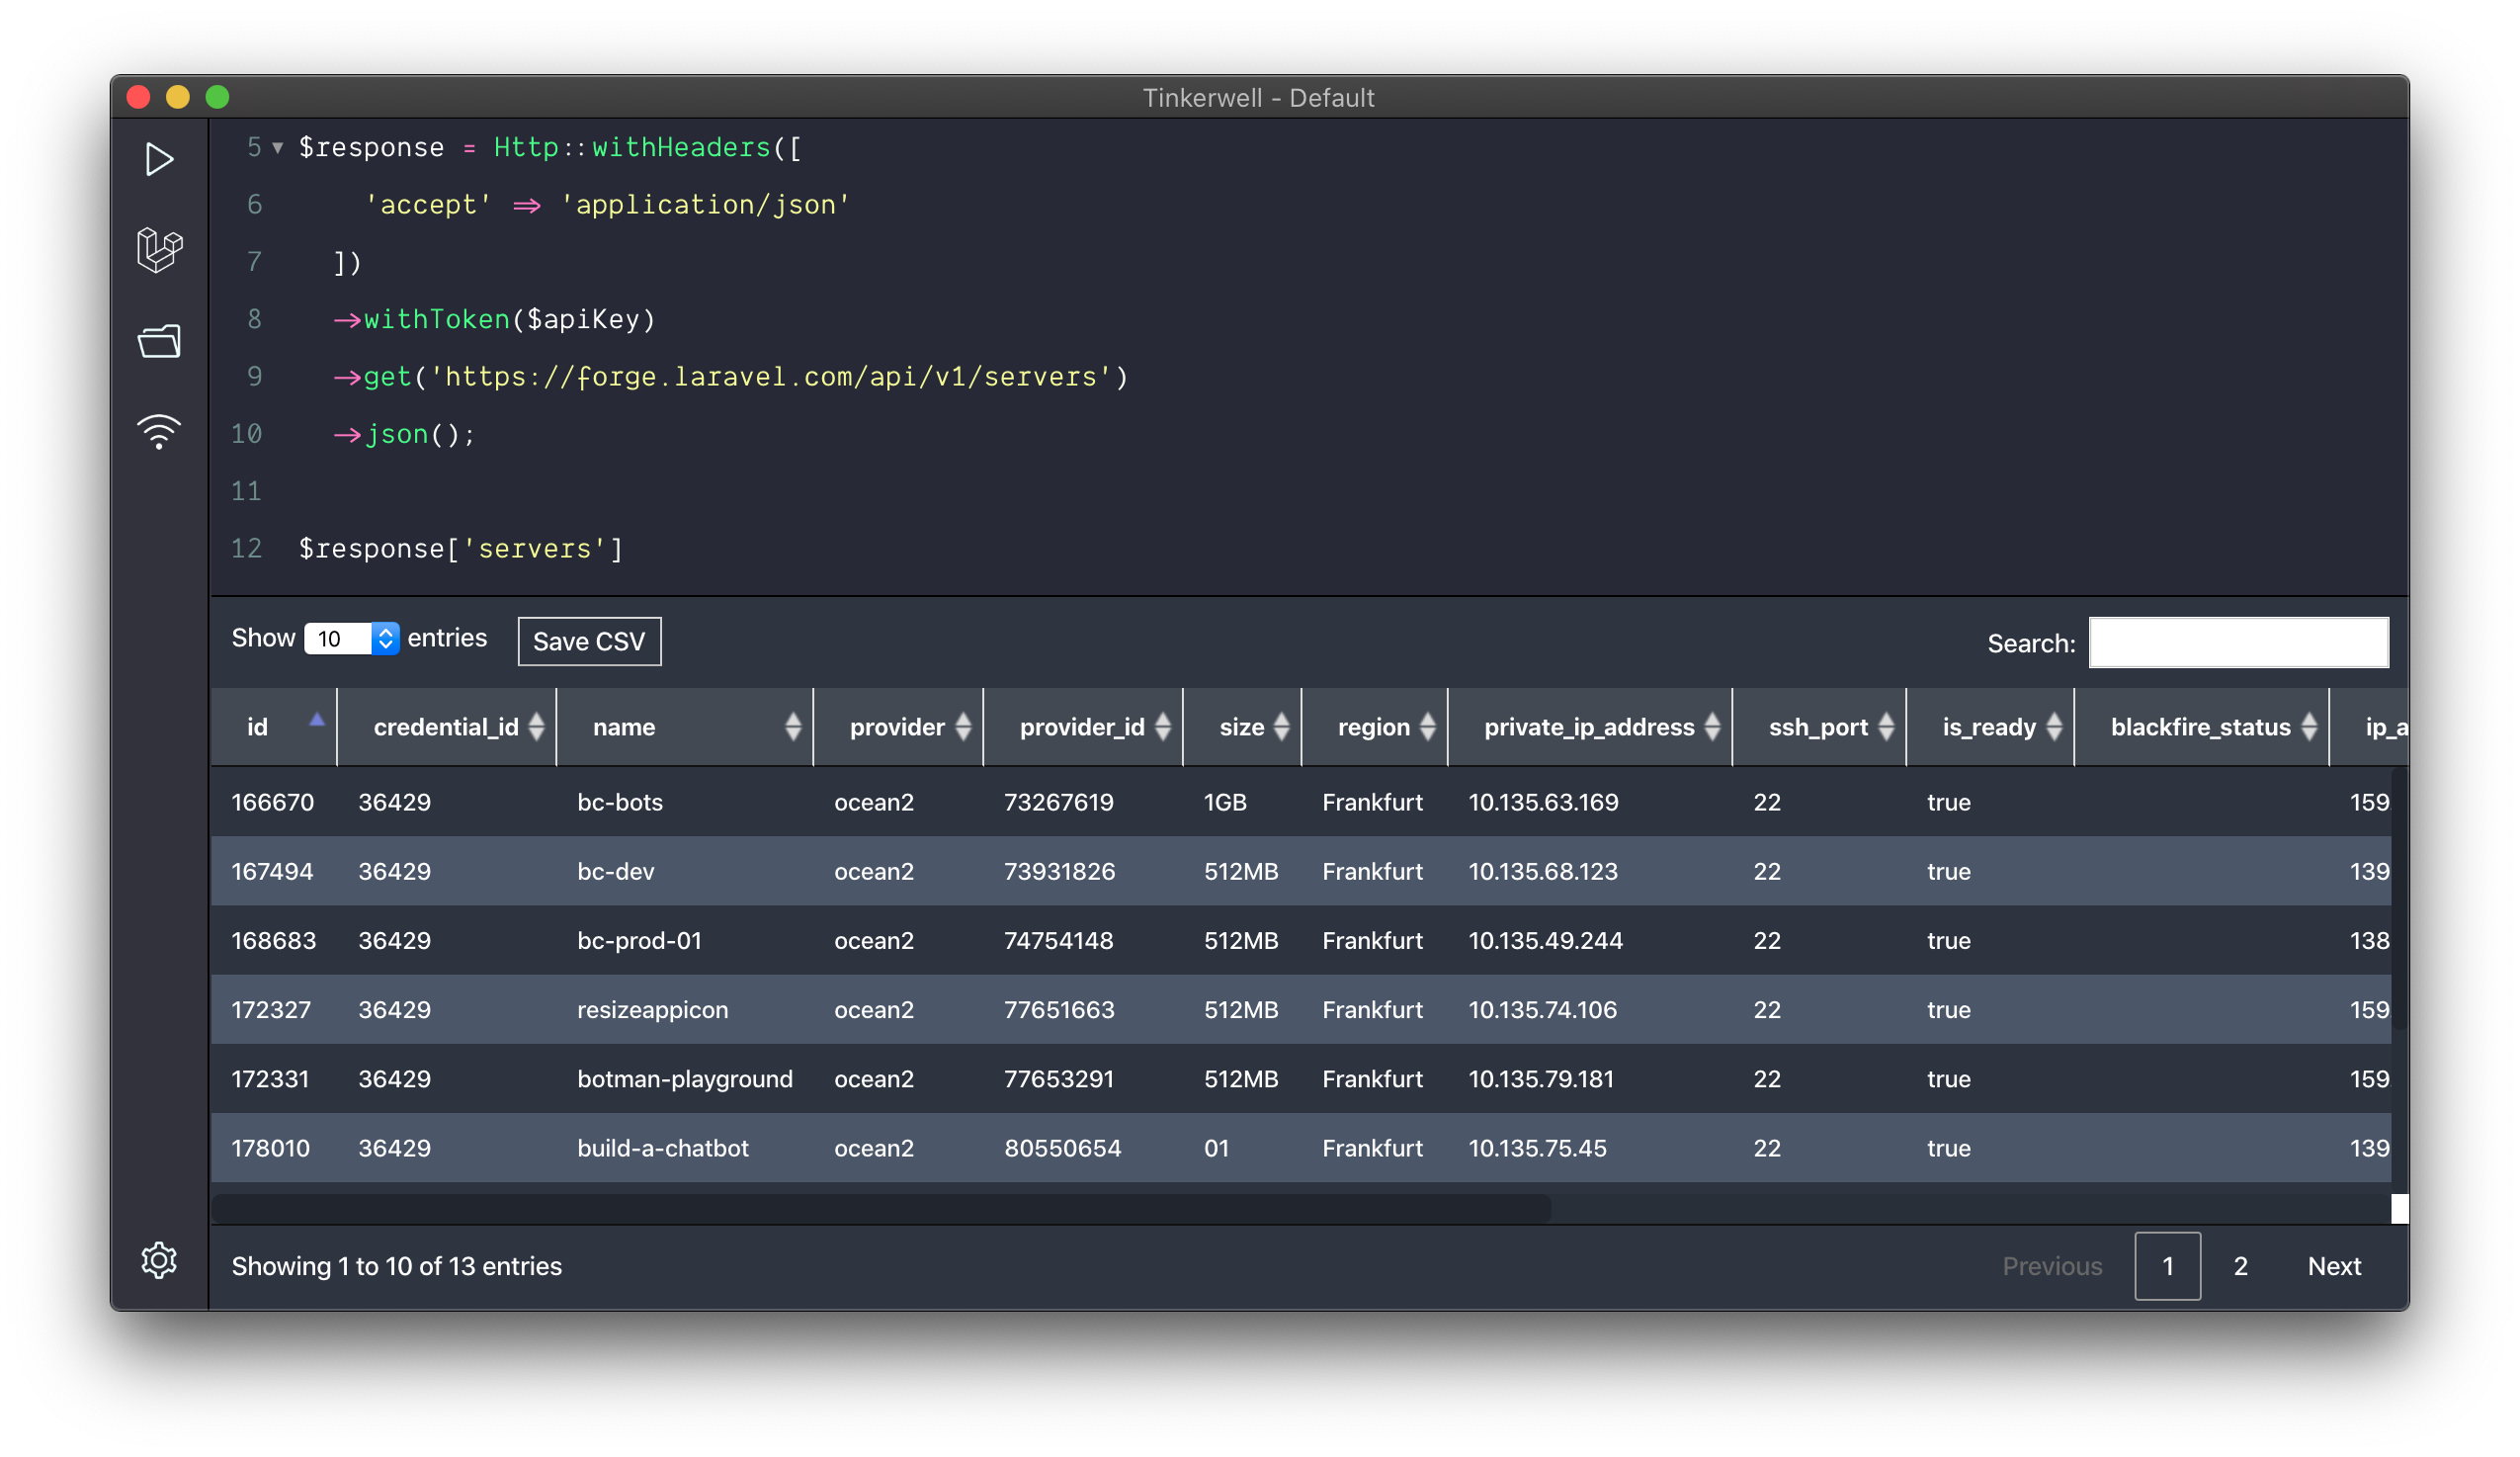
So now I can paginate the database results, search the table inline, or simply save the results as a CSV file for further processing.
I hope that this will make it a lot easier when you need to dive into HTTP API responses the next time, by making use of Tinkerwell and Laravel 7 .