Invoker
Plugins
Plugins allow you to enhance Invoker with custom functionality. These plugins hook into various sections of Invoker and the project lifecycle. For example, a plugin could add its own navigation bar menu along with custom Vue components and PHP files. A plugin could also add a custom context menu entry when right clicking your models in the table view or add a custom detail panel that will be available on your model detail pages.
Installing Plugins#
A custom Invoker plugin can be installed in two different ways. If it is a plugin that is available in the plugin marketplace, you can search for it on the "Plugin Marketplace" tab.
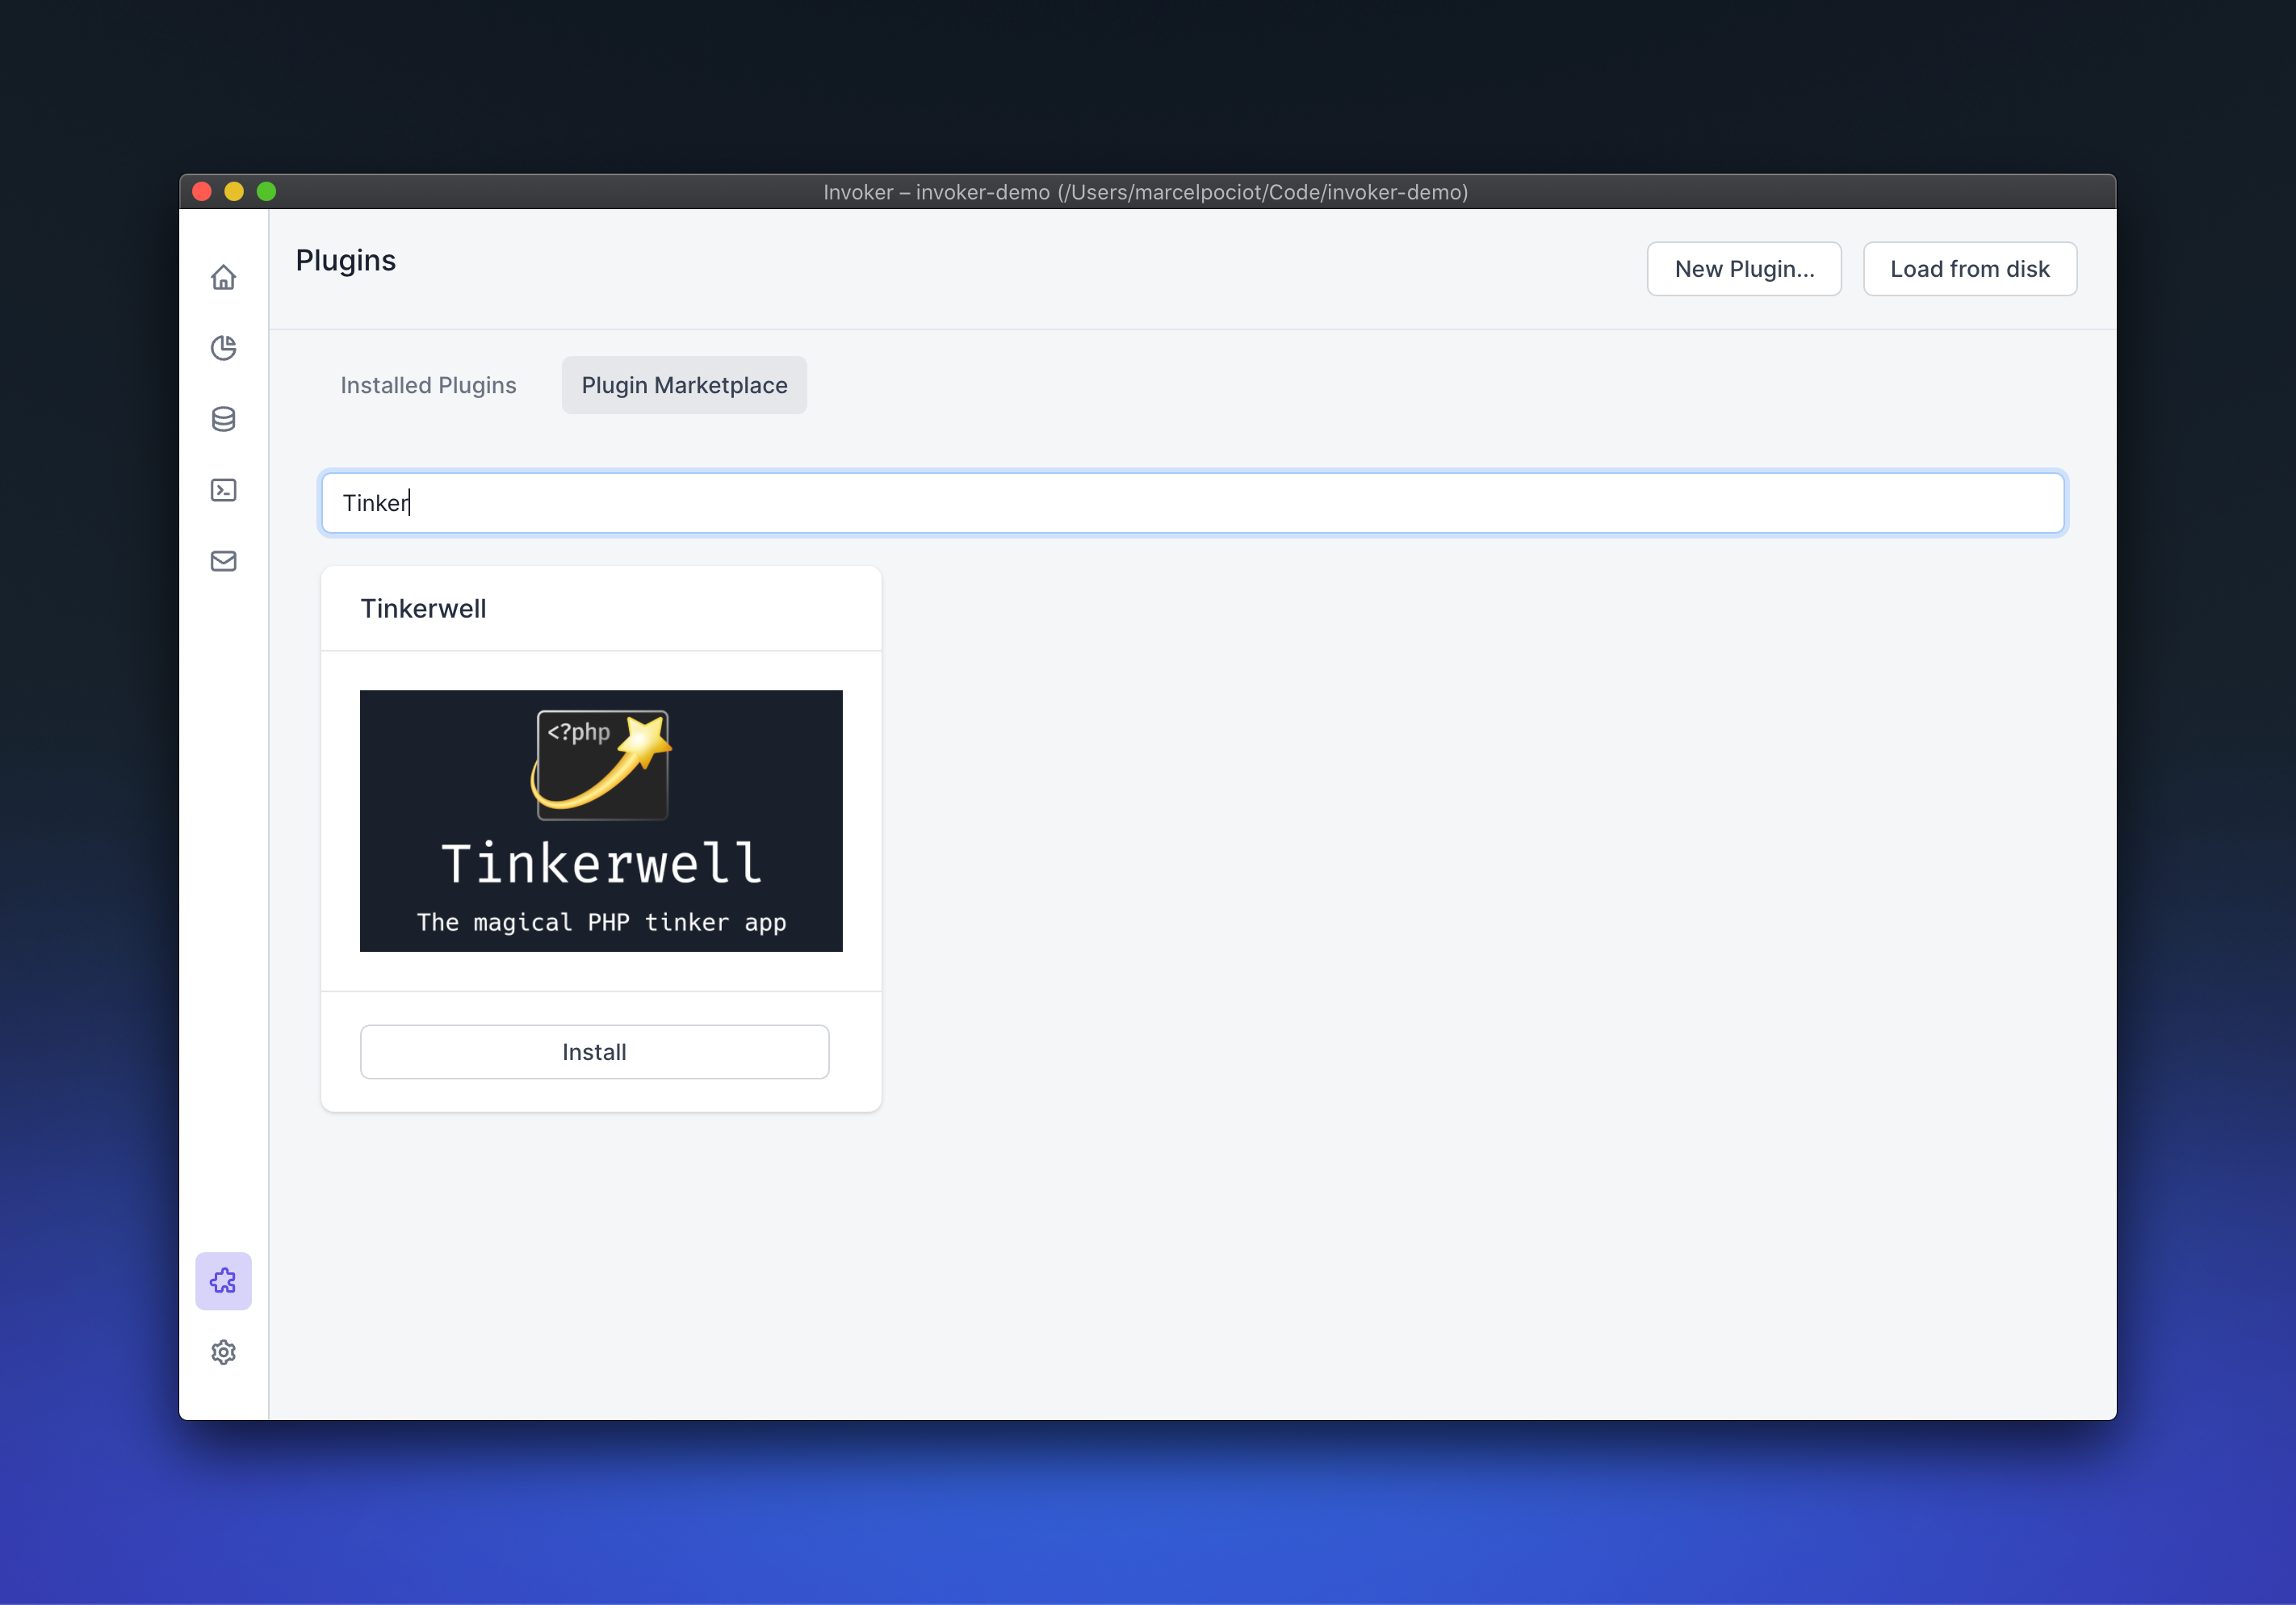
To install a plugin from the marketplace, click on the "Install" button. Once the installation is finished, Invoker will instruct you to restart the application in order to apply the plugin.
If a plugin is not available on the Invoker marketplace, such as private plugins, you can load the plugin zip file choosing the "Load from disk" button. Simply navigate to the zip file of your plugin to install it.
Similar to the plugins from the marketplace, you will need to restart Invoker in order to apply the plugin changes.
Uninstalling Plugins#
If you want to delete a plugin from Invoker, you can find it in the list of "Installed Plugins". Hover over the plugin card and choose the delete icon to remove the plugin.
Invoker will instruct you to restart your application in order to fully remove the plugin from the application.
Built-in Plugins#
We are constantly adding new plugins to the list of built-in Invoker plugins. At launch, you will have access to the free Tinkerwell plugin. This plugin, once installed, allows you to run any PHP code within your opened Invoker project.
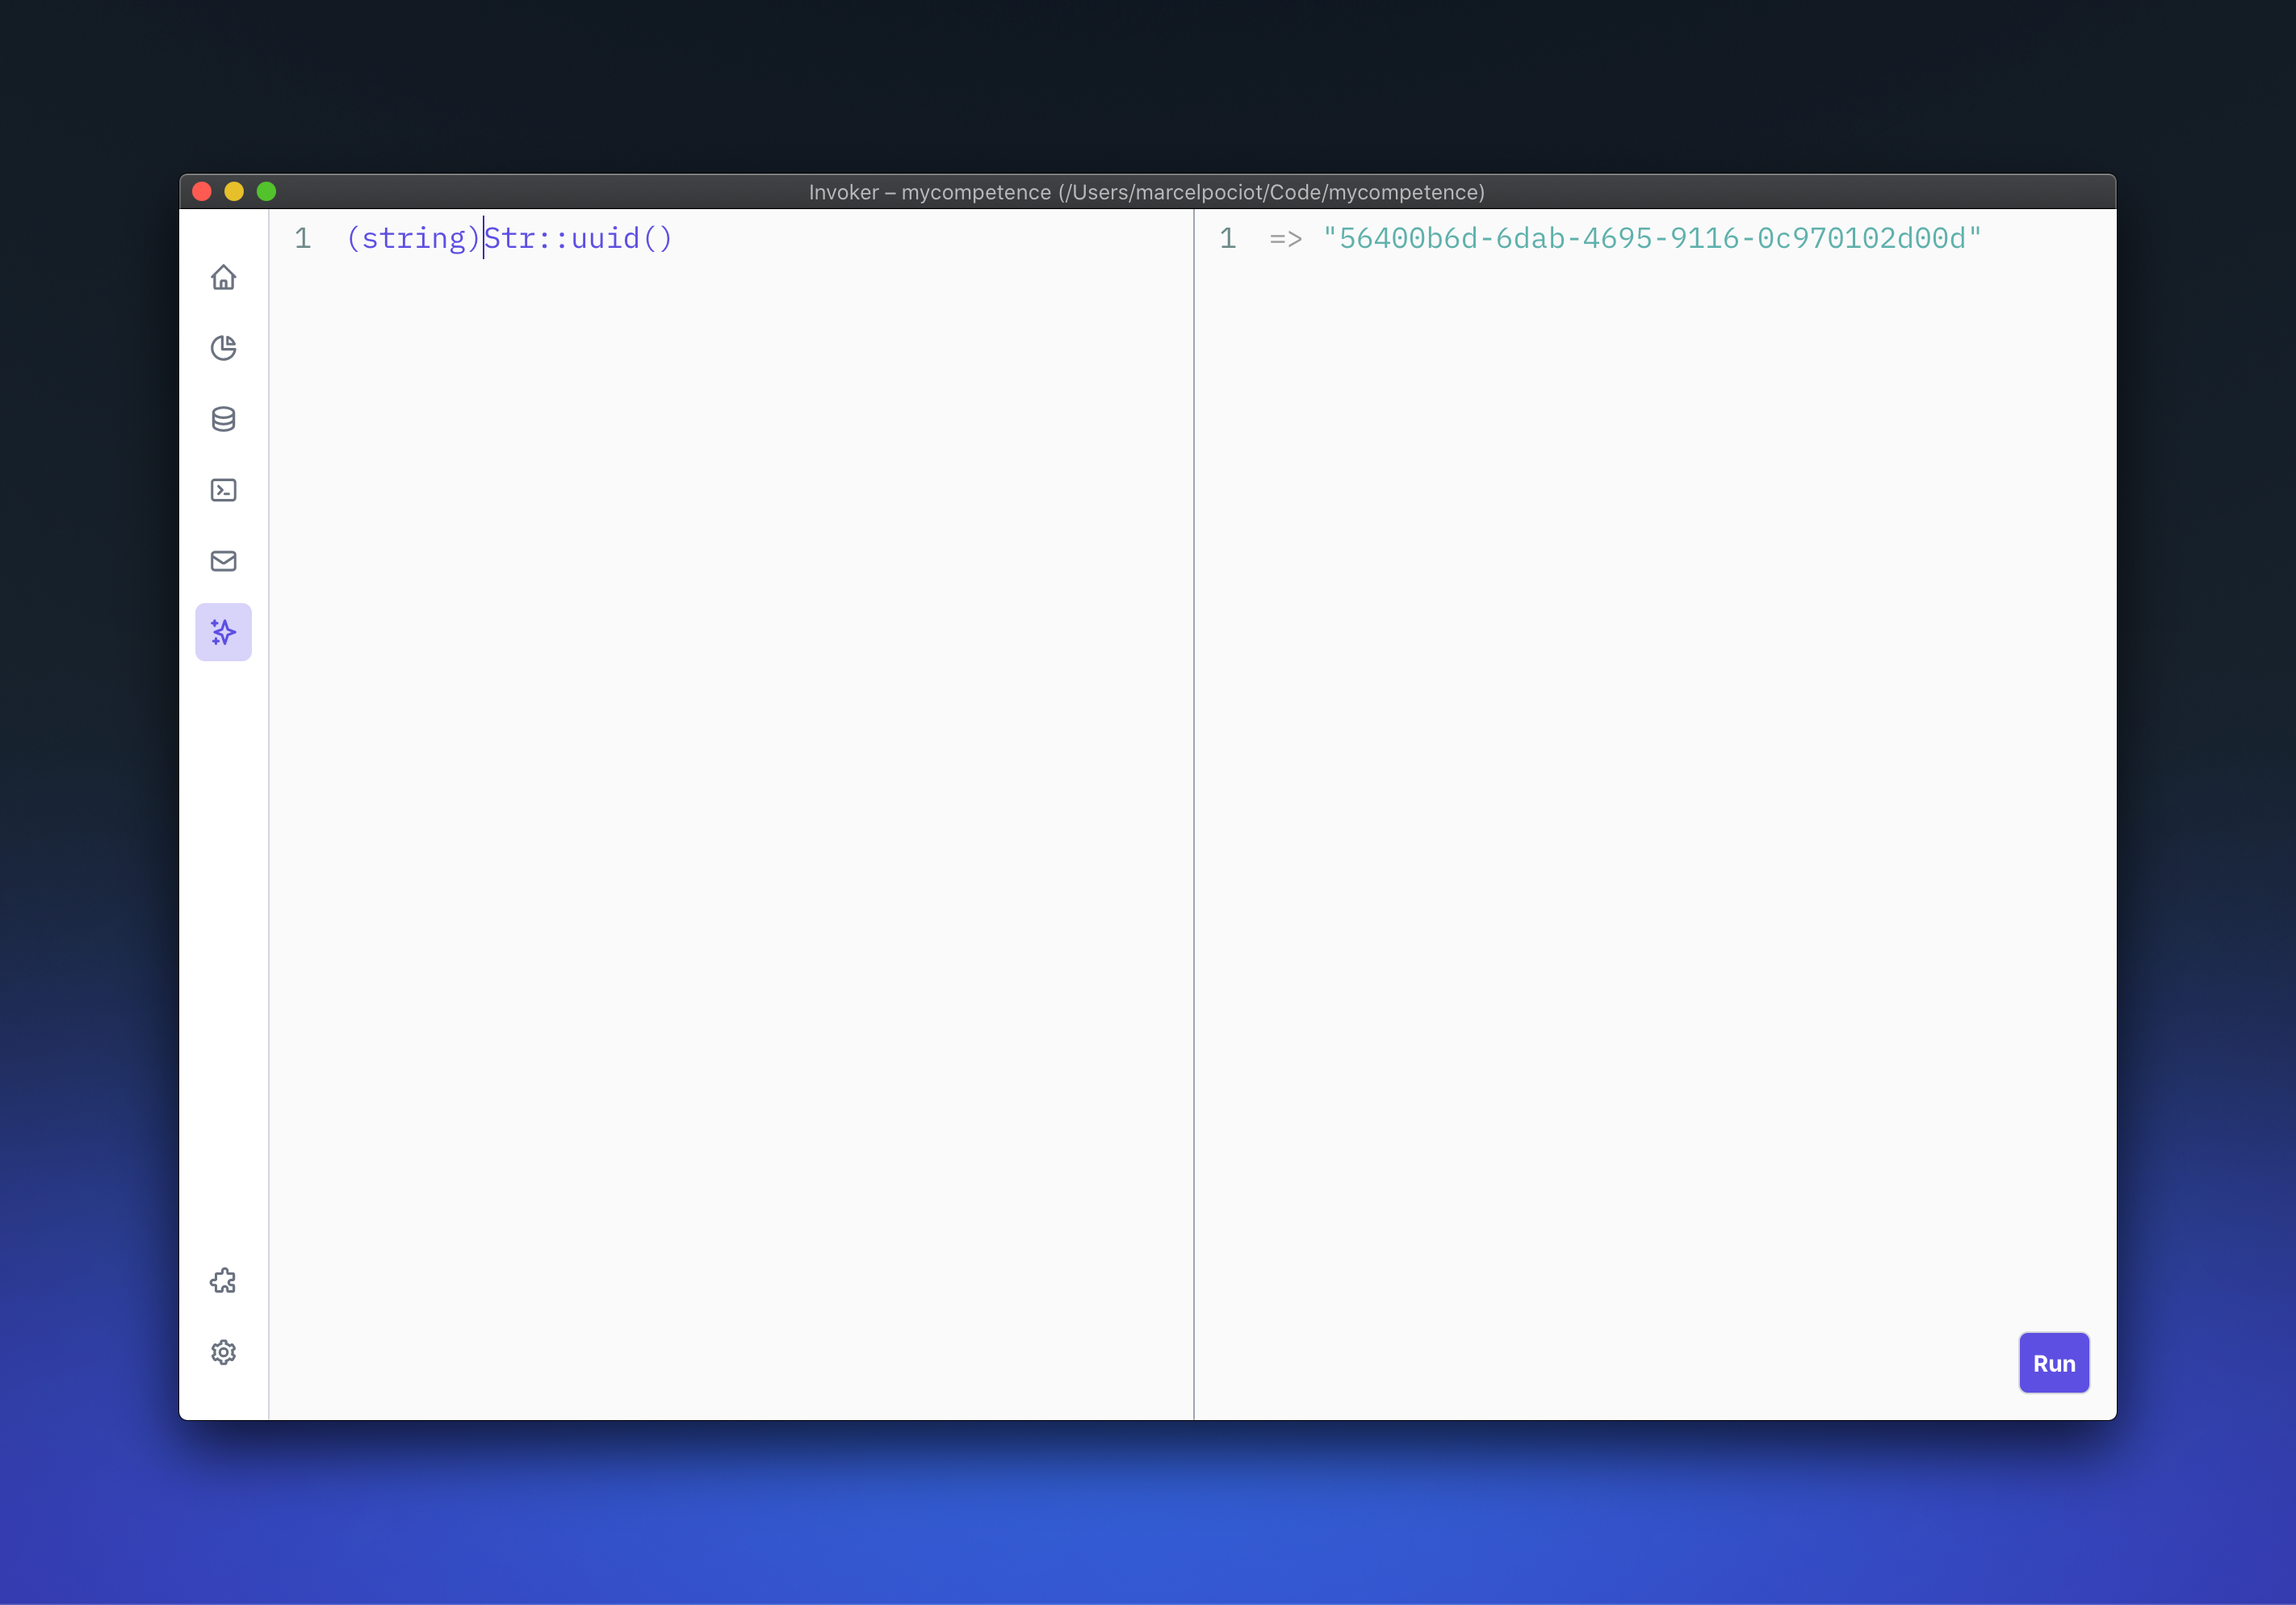
You can find and install the plugin from the Plugin Marketplace. To use the Tinkerwell plugin, open up any of your projects and you will find the Tinkerwell plugin in the navigation bar.
Enter any PHP code on the left side of the plugin and evaluate it by clicking the "Run" button, or by pressing the CTRL+R shortcut.
Extending Invoker
You can extend Invoker by creating plugins. These plugins can add completely custom functionality within the navigation bar, add a context menu entry to your model tables, or add a detail panel on the model detail view.
Creating a plugin#
To create your first Invoker plugin, choose the "New Plugin..." option in the "Developer" main menu, or press the "New Plugin..." button on the Plugins section of Invoker. This will open up the Plugin wizard in Invoker.
The first step is to define a name for your new plugin.
Next, you can choose one of the available plugin templates:
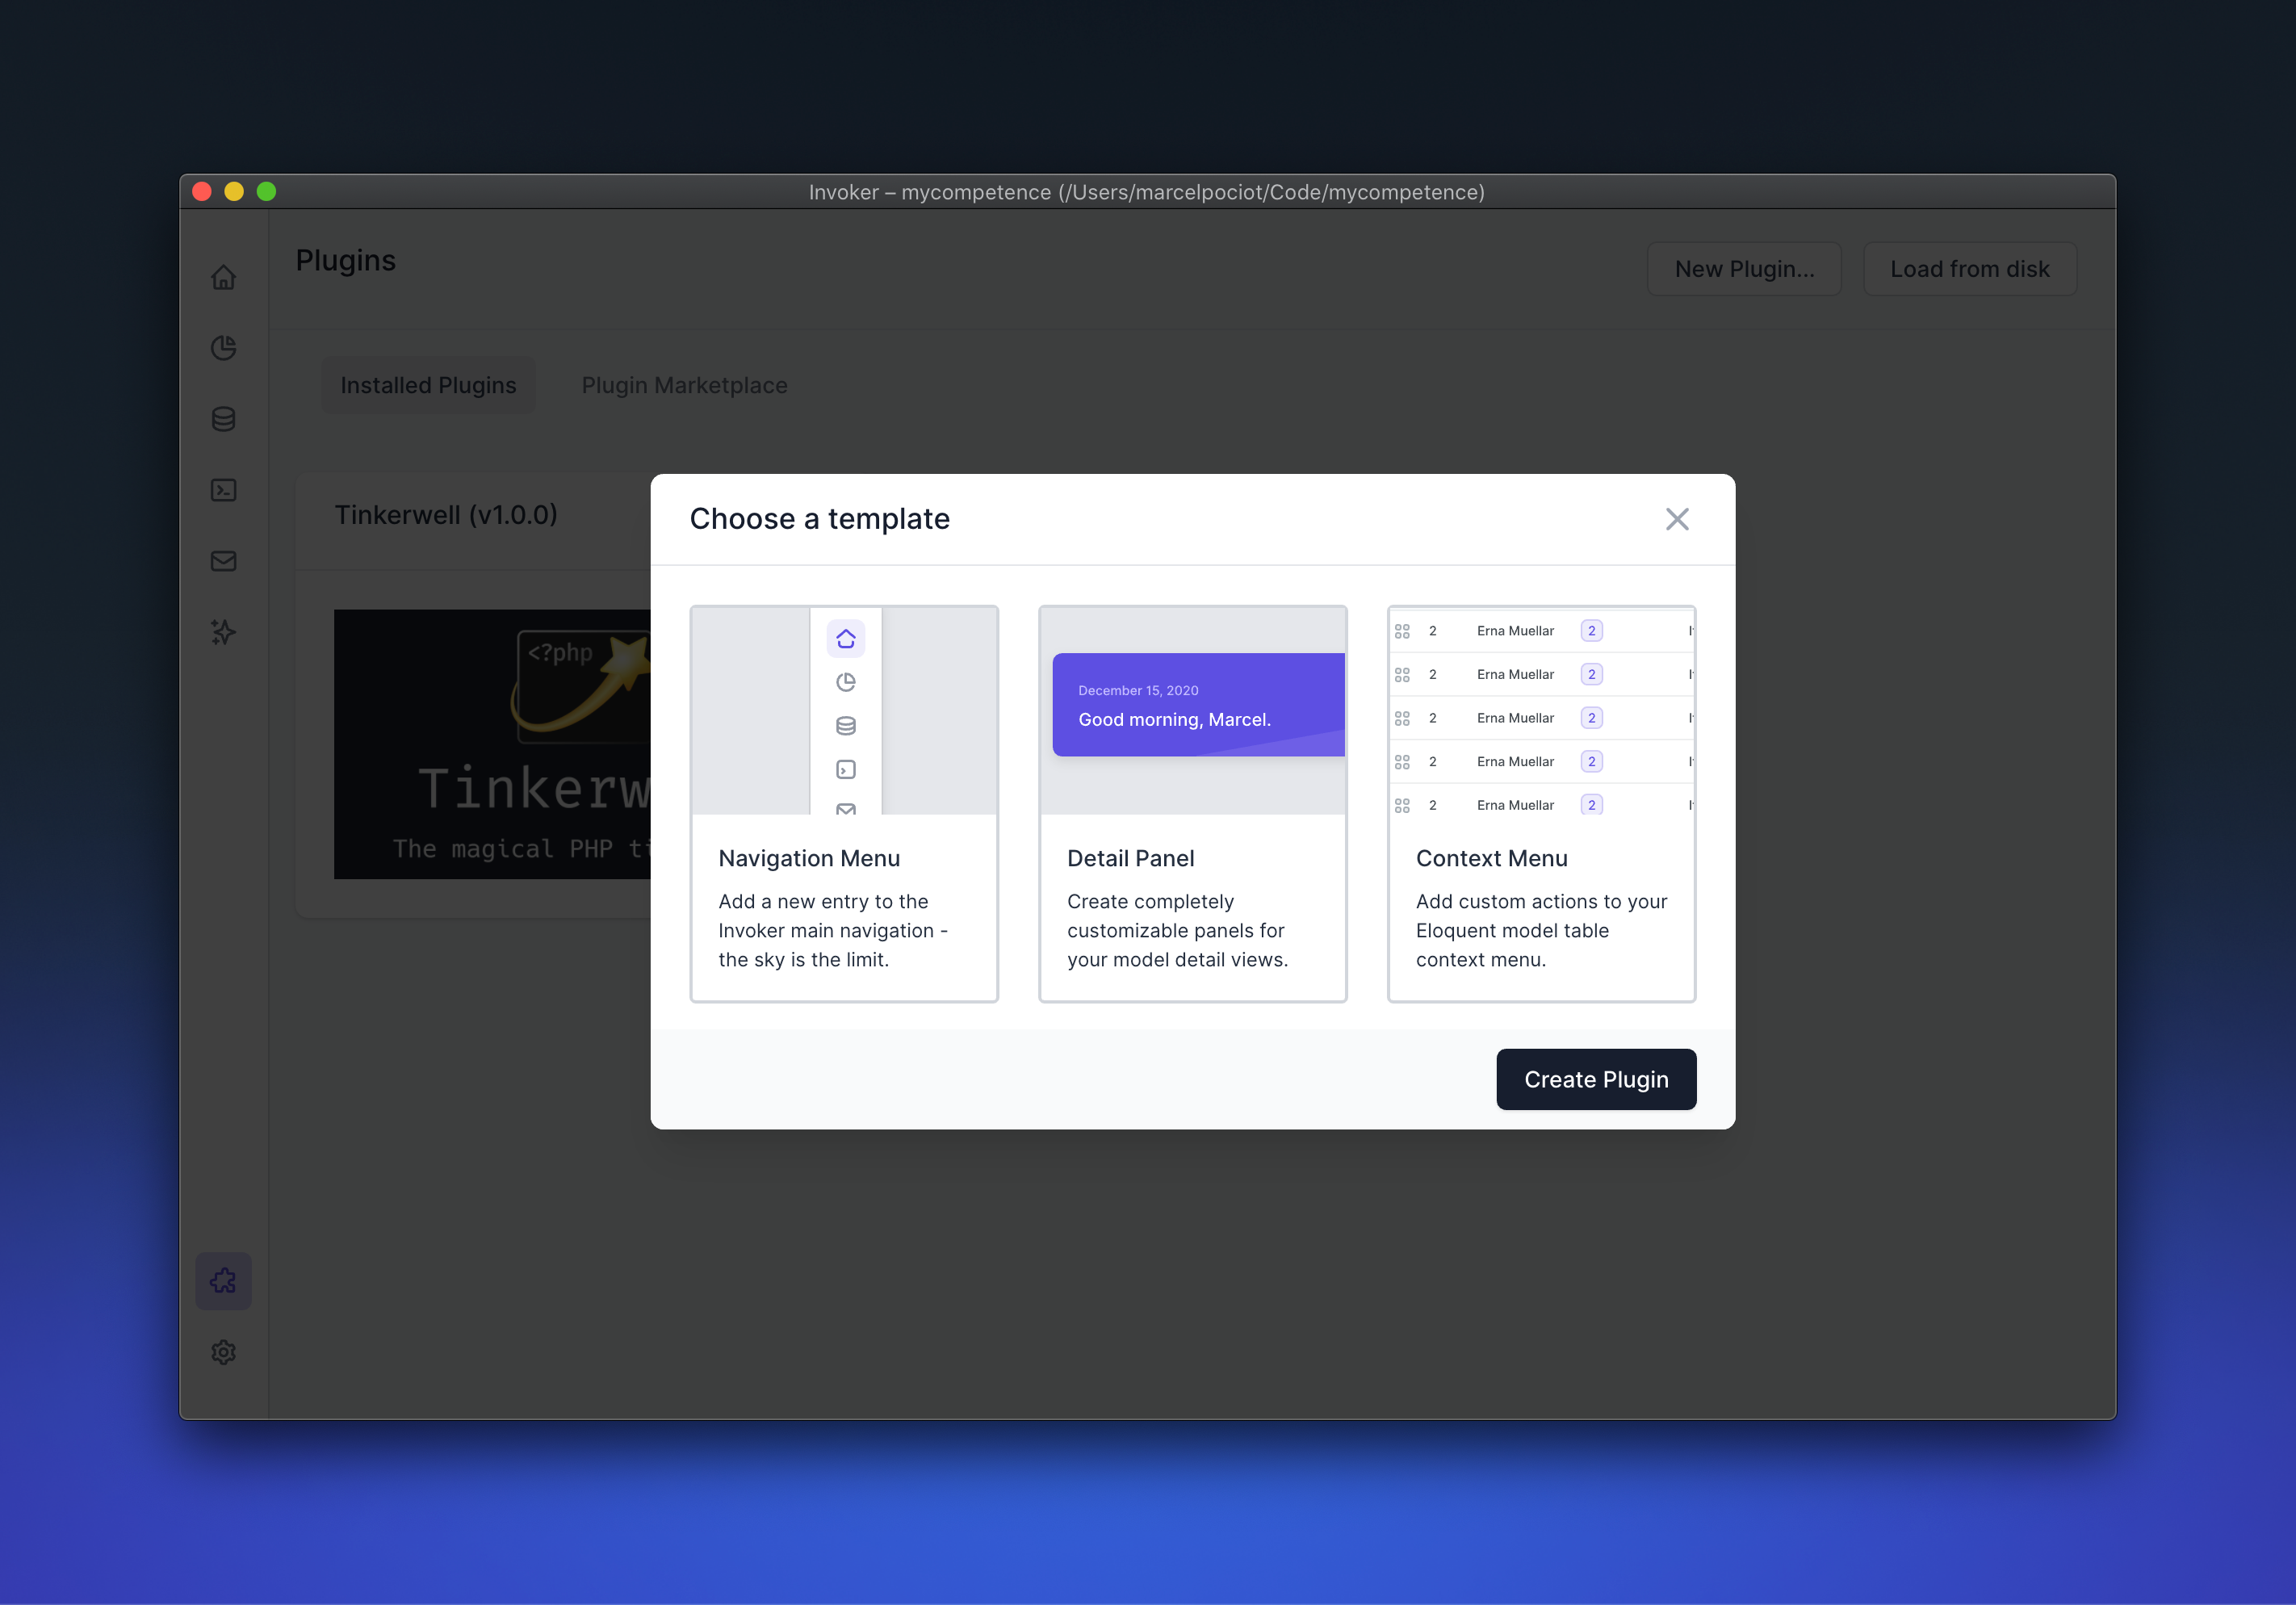
You can choose between:
Navigation Menu
Adds a custom navigation menu entry to Invoker. This is by far the most flexible and powerful plugin type, as you can add any kind of logic to your own plugin - ranging from custom system calls over network requests up to PHP evaluation.
Detail Panel
Adds a custom panel to the list of available panels when viewing the details of any model. These panels can be styled in any way you want them to look and can make use of network requests, PHP code and much more.
Context Menu
Adds a context menu to the table view of your models. This is useful if you want to provide custom actions for your models, such as marking a user as verified, giving out a refund for an order etc. You can easily create custom confirmation modals when running these context menu actions. Just like the other plugins you have full access to system APIs, network requests and PHP evaluation.
Once the plugin is created, it will be stored within a invoker/plugins folder inside of your project. This allows you to add those plugins to version control - so the next time you or your teammates open up Invoker, they will automatically benefit from your plugin.
Note: To see the plugin in Invoker, you will need to build the distribution files/start watching for code changes and restart Invoker.
General Plugin Information#
All Invoker plugins are written in TypeScript and come with our custom typings. This makes it easier for you to get started with writing your own custom plugin, as you can immediately see which methods and attributes are available within the exposed Invoker Plugin API.
After creating a plugin template, install the necessary dependencies using NPM or Yarn.
npm install
Plugin Development Flow#
During the development of your plugin you will often need to reload Invoker in order to apply your code changes. As the bundled Invoker application does not allow hot-reloading, we tried to make the process as developer friendly as possible.
First off, start your plugin in "watch" mode, so that all code changes will be automatically applied to the bundled distribution file:
npm run watch
This is going to watch your code for changes and automatically write the distribution files that Invoker will pick up.
Depending on the plugin type there are different ways how you need to reload your plugin:
Context Menu Plugins
Context menu plugins can automatically be refreshed by selecting "Developer / Reload Plugins" (or you can use the appropriate keyboard shortcut). This will reload the plugin immediately.
Navigation Plugins / Model Detail Panels
Model detail panels and navigation plugins can not be "hot reloaded" like context menu plugins. Instead you will need to refresh the application - similar to how you would refresh a browser page. This can be achieved by pressing CTRL/CMD+Shift+R. Invoker will automatically reopen the project and page that you had last open to simplify the development process.
Global Variables#
Inside of your Invoker plugins, you have access to a global invoker variable, that lets you interact with Invoker, get access to the currently opened project, evaluate PHP code, open up confirmation modals, show notifications to the user and much more.
Please use the bundled Typescript bindings to know about all of the available methods on the invoker object.
Debugging your Plugins#
Invoker allows you to inspect your plugin and see possible errors and console logs right in the devtools - just like you would debug with Chrome. To open up the devtools, choose the "Developer / Open Devtools" menu item.
Building/Distributing your Plugin#
Once you are finished with the development of your plugin, you can put run the following command to create a production ready version of your plugin:
npm run prod
This will write the production bundle to the dist folder. Your plugin is now ready to be commited to version control, in case you want to distribute it along with your project.
If you would rather build your project as a ZIP file so that you can share it with other Invoker users, you can run:
npm run build-plugin
This is going to create a ZIP file with your package.json version number attached to it. You can then distribute this ZIP file to other Invoker users, who can then install your plugin via the "Load from disk" button on the plugin view.
Context Menu Plugins#
To create a new context menu plugin, you may use the appropriate plugin template.
Inside of the resource/js/renderer.ts file, you will see all the code that is required for a custom context menu action.
This is the code that you will find in the default template:
export default (context: PluginContext) => {
context.modelContextMenu.add({
item: {
label: 'My custom context menu',
click: (selectedEntries, modelDefinition) => {
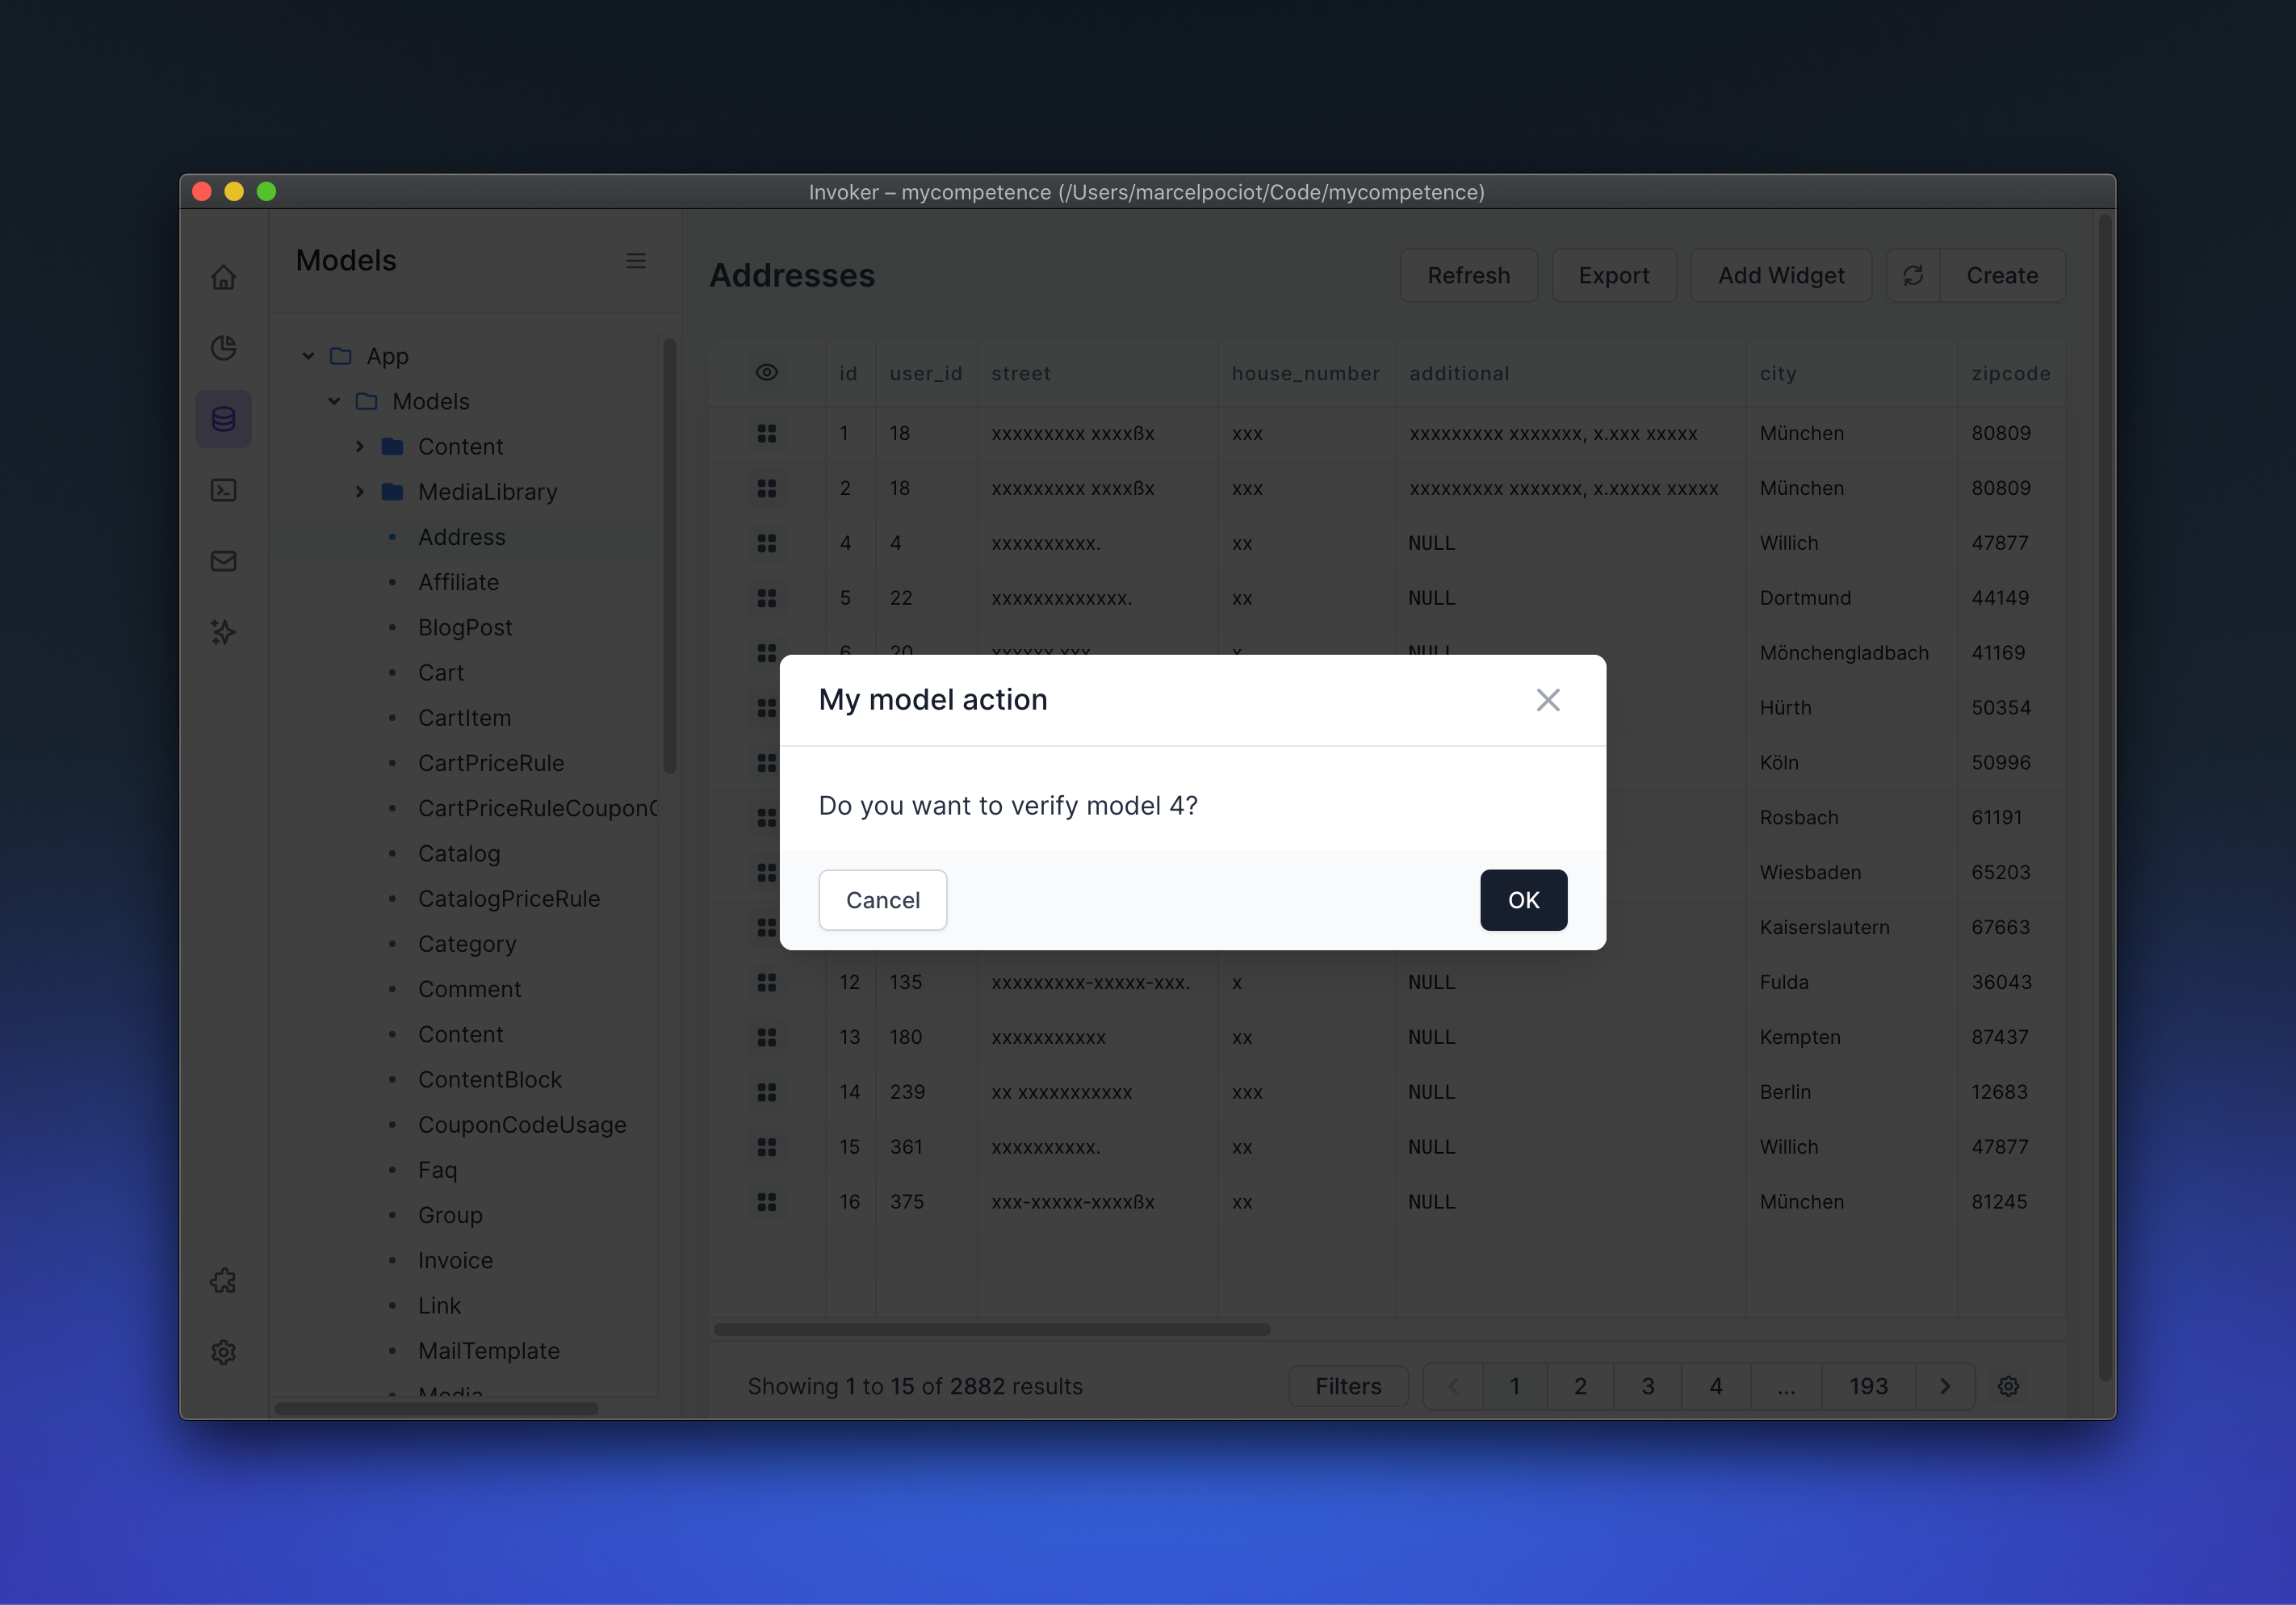
invoker.showConfirmation({
title: 'My model action',
text: `Do you want to verify model ${selectedEntries[0].id}?`,
onConfirm: async () => {
await invoker.evaluate(`
$model = ${modelDefinition.model.class}::find(${selectedEntries[0].id});
// Run any PHP code you want
`)
invoker.showNotification({
title: 'Model verified',
text: `Successfully verified model ${selectedEntries[0].id}!`
})
}
})
}
},
isVisible: (selectedEntries, modelDefinition) => {
return true;
}
});
}
The context.modelContextMenu.add function instructs Invoker to add a new menu item to the context menu. You can provide an item, which defines the context menu item itself, as well as a isVisible callback function.
This function determines where and when your context menu should be visible to the user.
For example, you could define a custom context menu item that is only available for a User model. The isVisible check would look like this:
isVisible: (selectedEntries, modelDefinition) => {
  return modelDefinition.model.class === 'App\\Models\\User';
}
Or if you want to provide a context menu item that is only available when more than one model is selected, it would look like this:
isVisible: (selectedEntries, modelDefinition) => {
  return selectedEntries.length > 1;
}
The item attribute defines the context menu item itself. It consists of the following attributes:
-
label- The label that is visible in the context menu -
click- A callback function that gets evaluated once the user clicks on your context menu item. This method retrieves an array containing the selected model entries, as well as an object describing the model itself.
In this example, once the user clicks on the context menu, we are using a built-in confirmation modal from Invoker and show it to the user. Once the modal is confirmed, we use the invoker.evaluate method to run PHP code and then use invoker.showNotification to show a notification to the user inside of the Invoker user interface.
Model Detail Panel#
To create a new model detail panel plugin, you may use the appropriate plugin template.
Model detail panels register a Vue component that gets loaded whenever a user chooses to show the panel on any models detail view.
import Panel from "./components/Panel.vue";

export default (context: PluginContext) => {
  context.modelDetails.add(Panel)
}
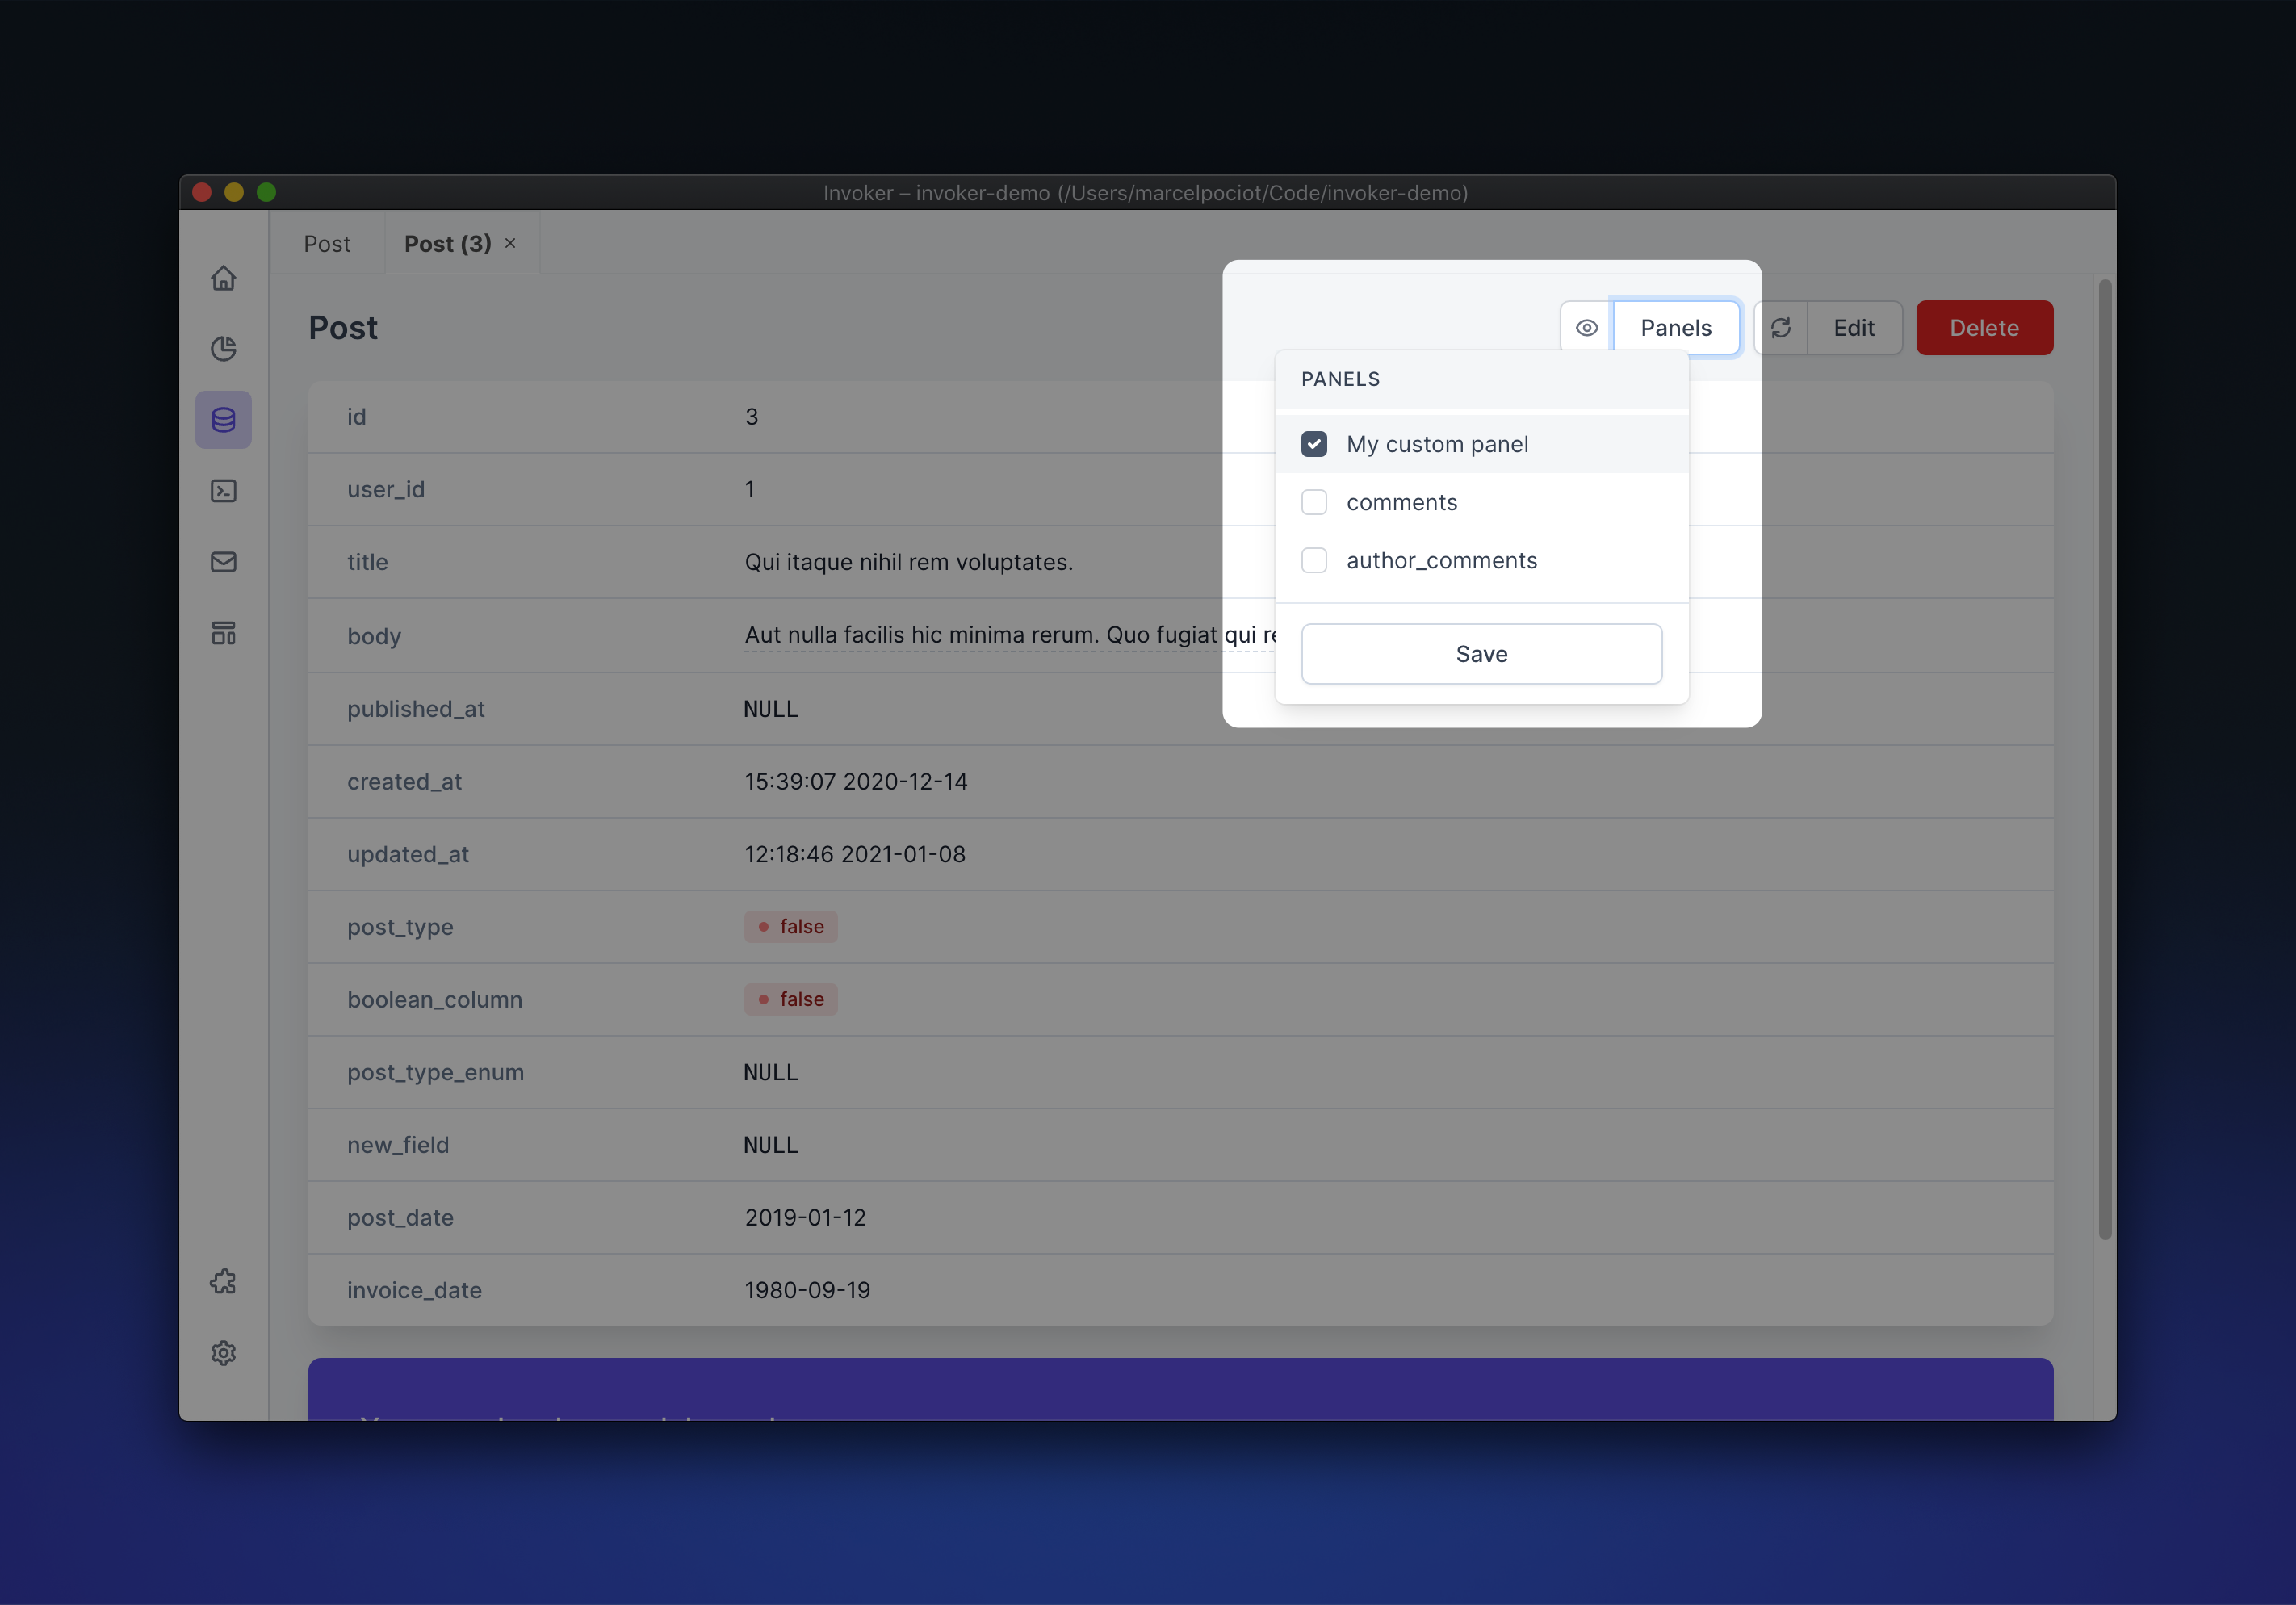
The model detail panel can be selected like any other relation, on the "Panels" button.
Note: This means that your custom panels can be used across all available models in your Laravel application. If for some reason you want to restrict the usage of your custom panel, you should validate the class of the selected model. You can access the class using modelSettings.definition.model.class
The Vue component itself has access to the global invoker object, to execute PHP code.
The currently selected model, as well as a modelSettings object will be passed to the component as properties.
The model contains a JSON representation of the selected model instance. The modelSettings object contains all of the information about the model, such as all of its relations, accessors, columns and column types.
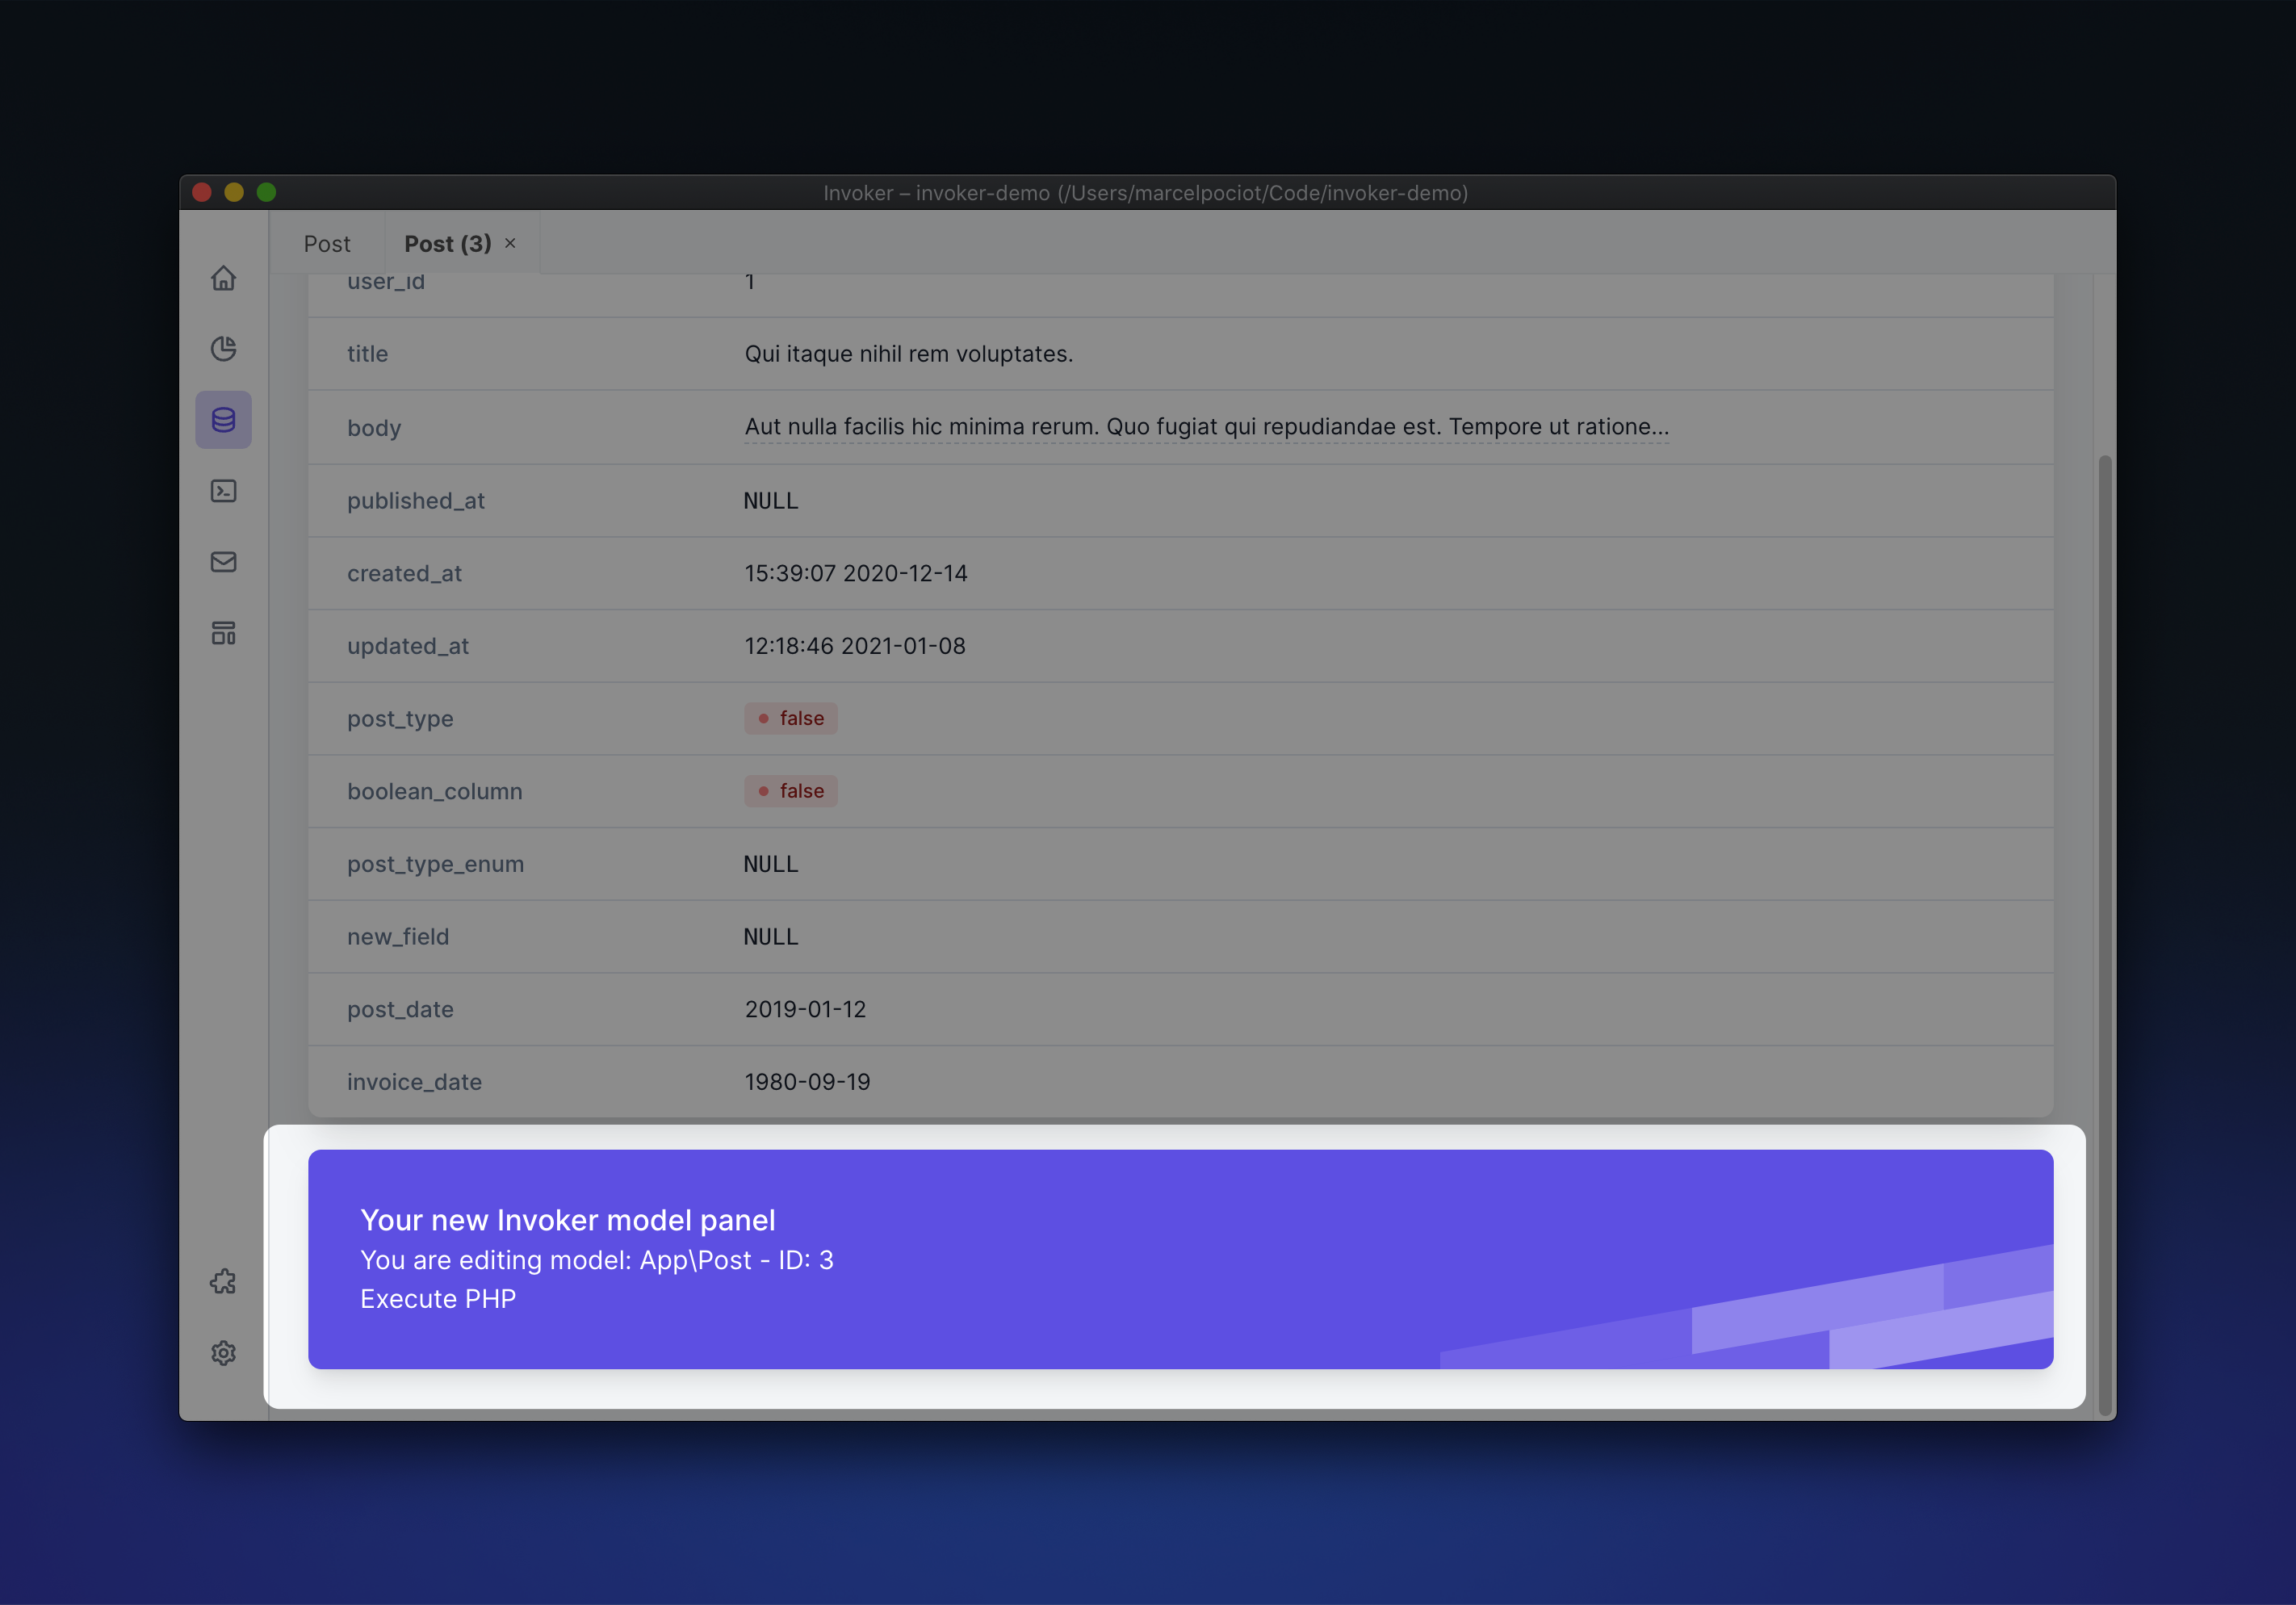
The built-in example plugin shows you how to evaluate custom PHP code and show the resulting text:
async evaluatePHP() {
	try {
		const { data } = await invoker.evaluate(`
			return now()->toDateTimeString();
		`);

		this.output = data.output;
	} catch (err) {
		this.output = output;
	}
}
Navigation Bar Plugins#
To create a new model navigation bar plugin, you may use the appropriate plugin template.
Navigation bar plugins are by far the most customizable plugin types. While the other plugins only evaluate short PHP strings on the fly, with a custom navigation bar plugin, you might want to bring along some more complex PHP logic.
That's why Invoker also allows you to ship your plugins with a bundled PHAR file, which will be used for PHP code evaluation. This allows you to add additional composer dependencies to your plugin. These PHAR files also work when connecting to remote servers via SSH.
In addition to the NPM dependencies, you need to install the composer dependencies too. Run composer install inside of your plugin directory.
Note: You can make use of the PHAR excecution in any of the available Invoker plugin types, but it is only included in the navigation bar plugin, to keep the other plugins simpler and lighter.
1st Party Open Souce Plugins#
Invoker includes several plugins that the core team at Beyond Code maintains. Some of them are open source: