Invoker
Widgets
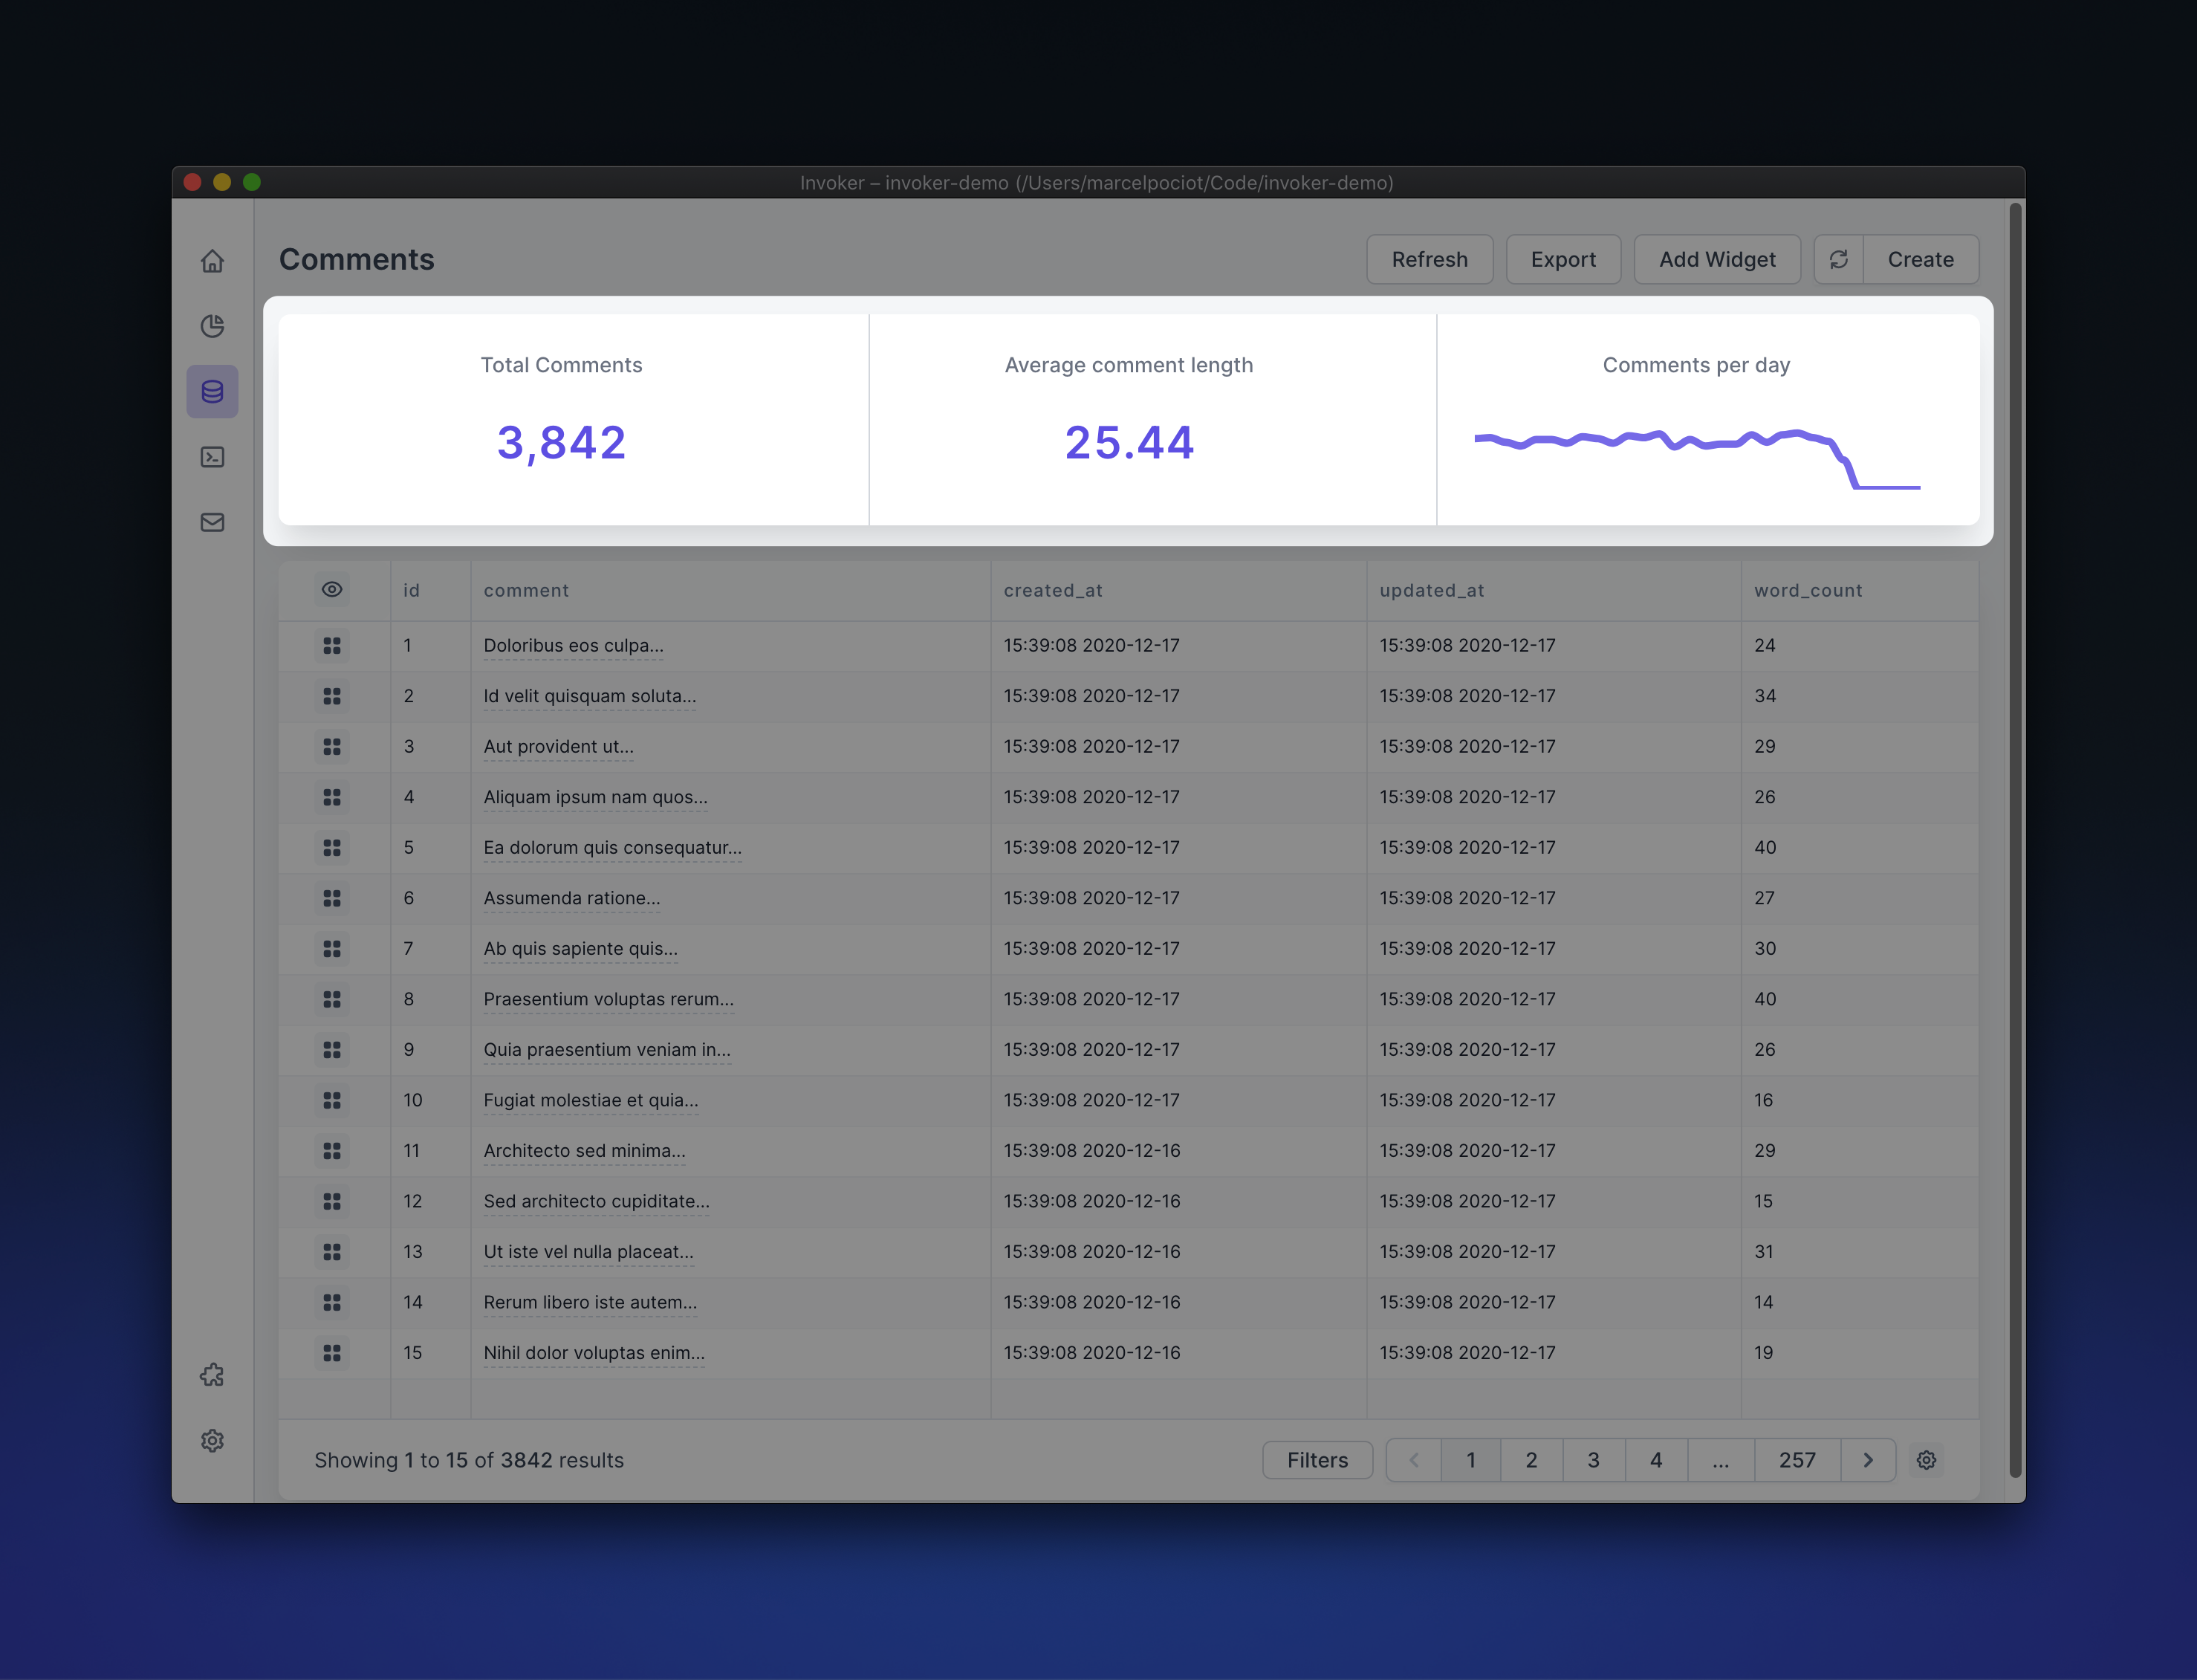
Widgets can be added to the table views of your Eloquent model and allow you to quickly get insights into the data that you have stored in your database.
Creating Widgets#
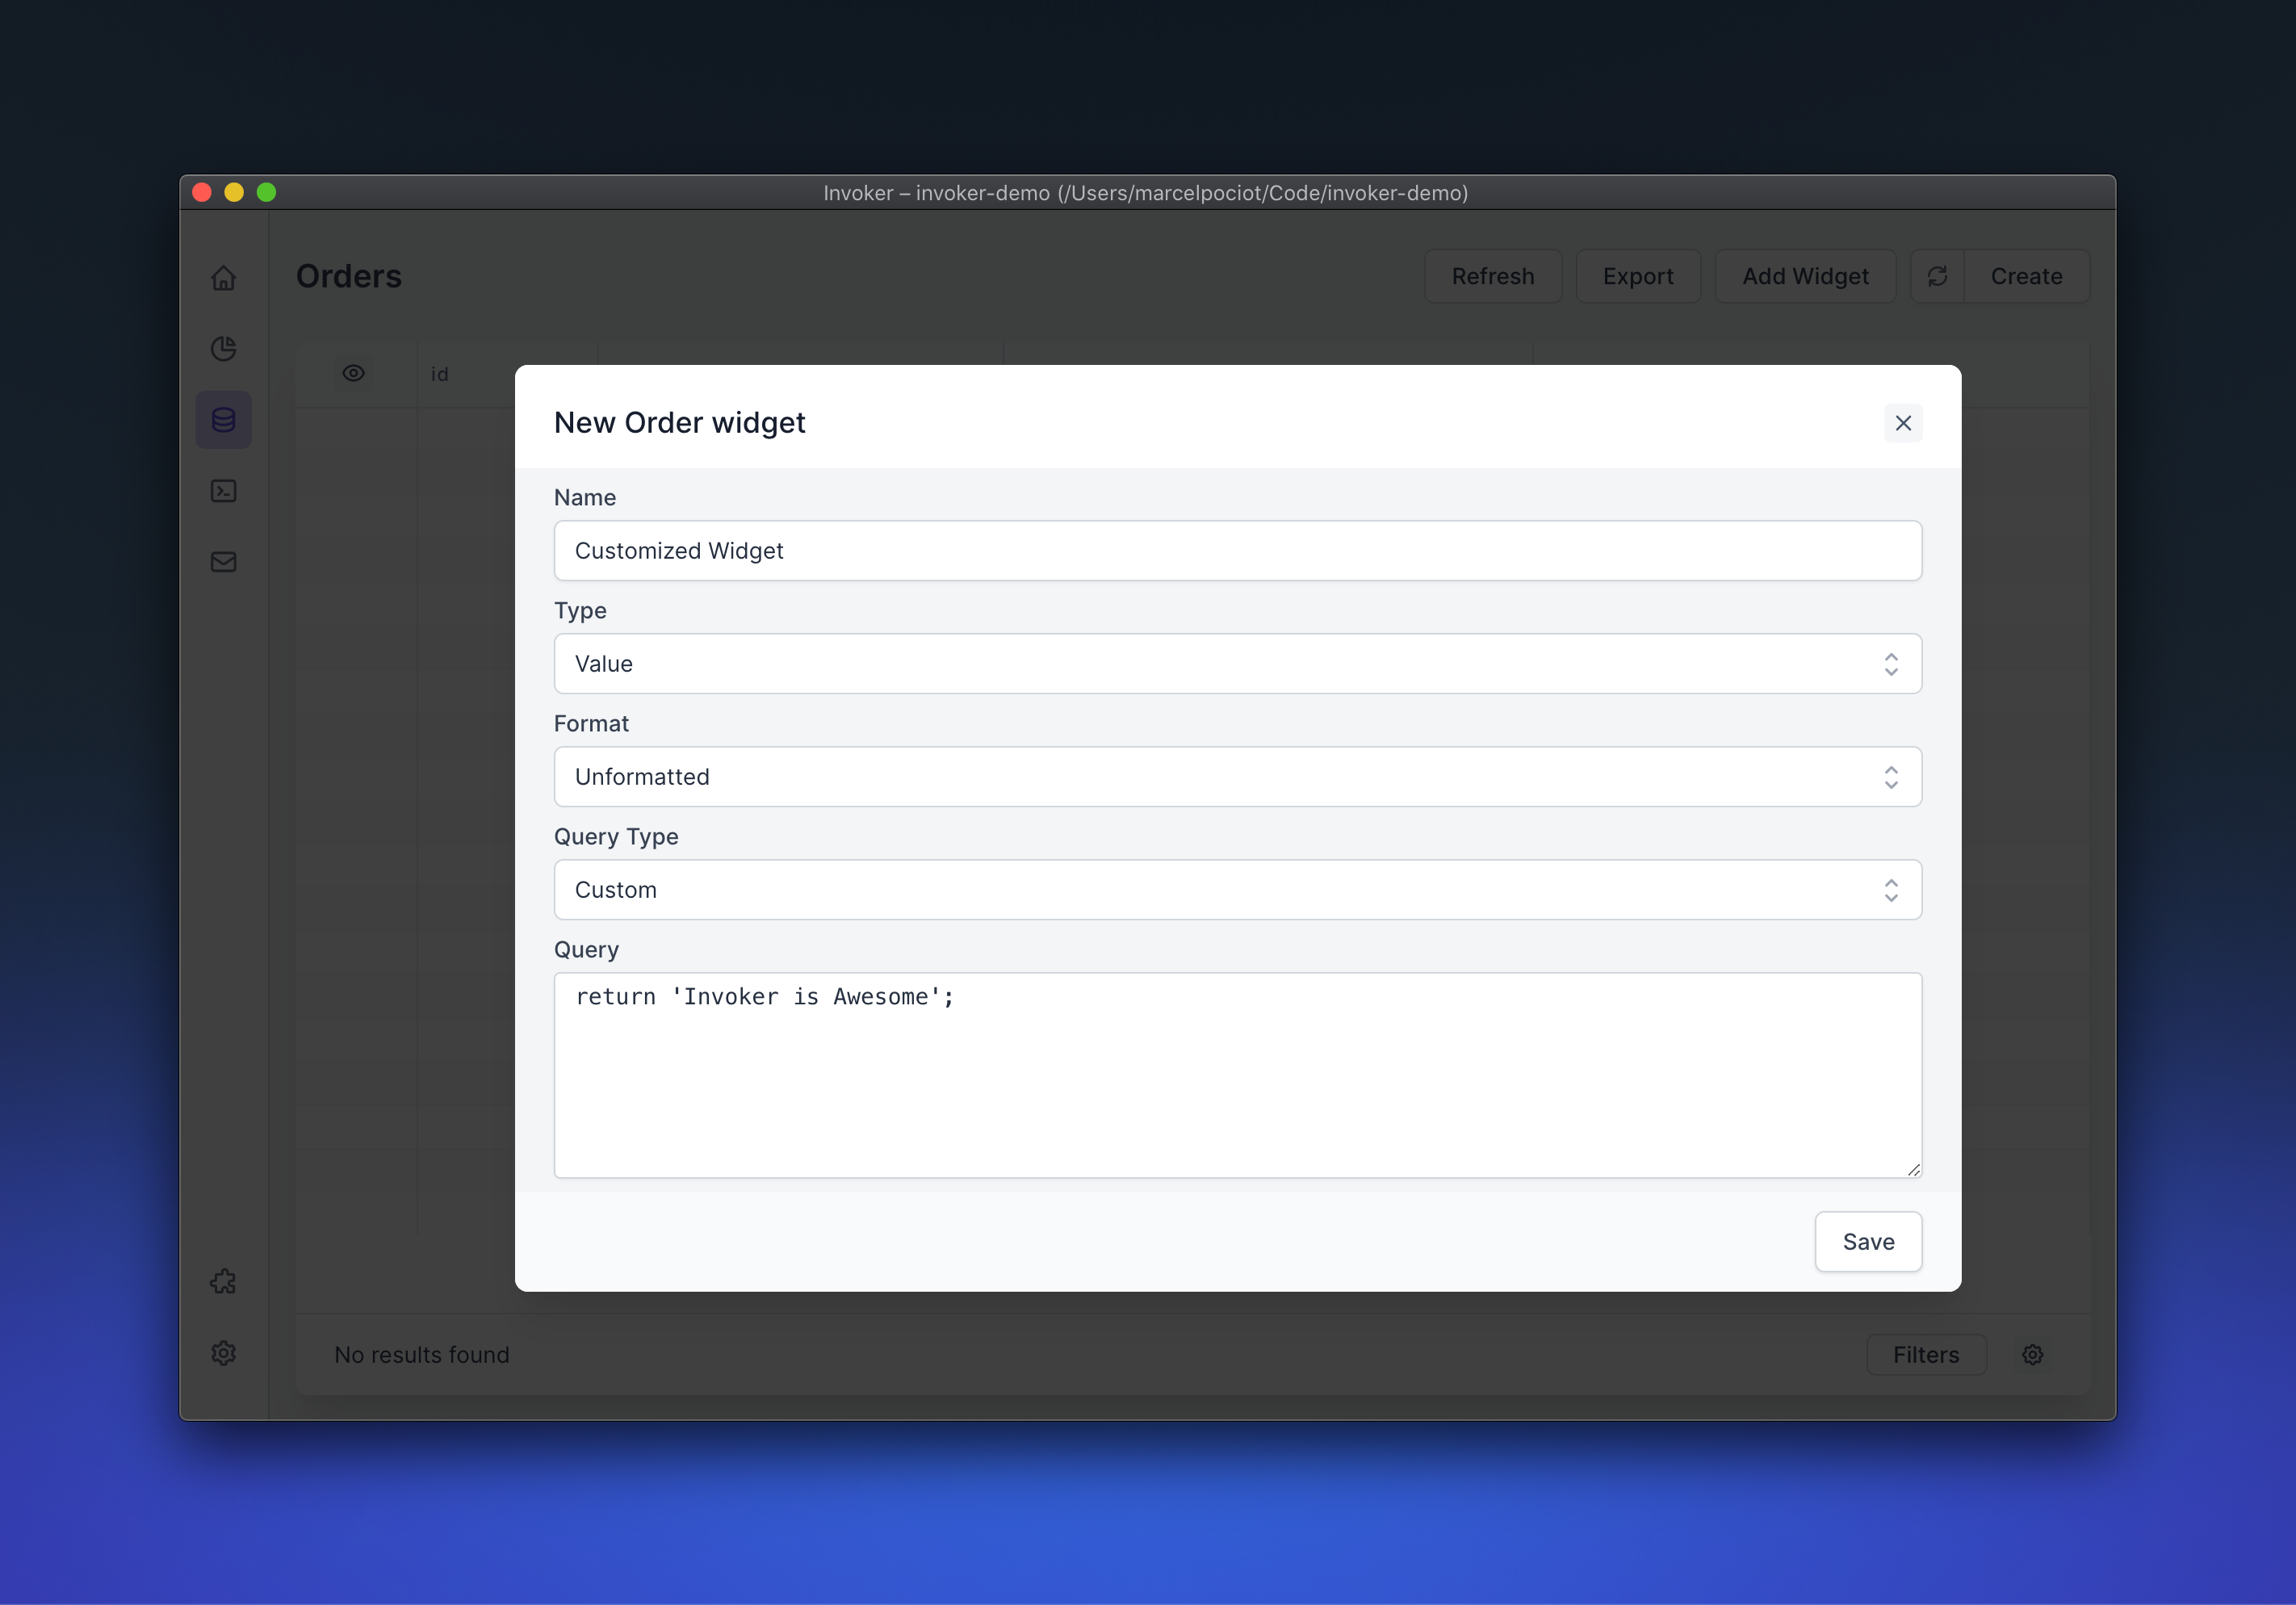
To create a new widget, click on the "Add Widget" button on a model table view. This will open up a modal that contains the options to further specify which kind of widget you want to create.
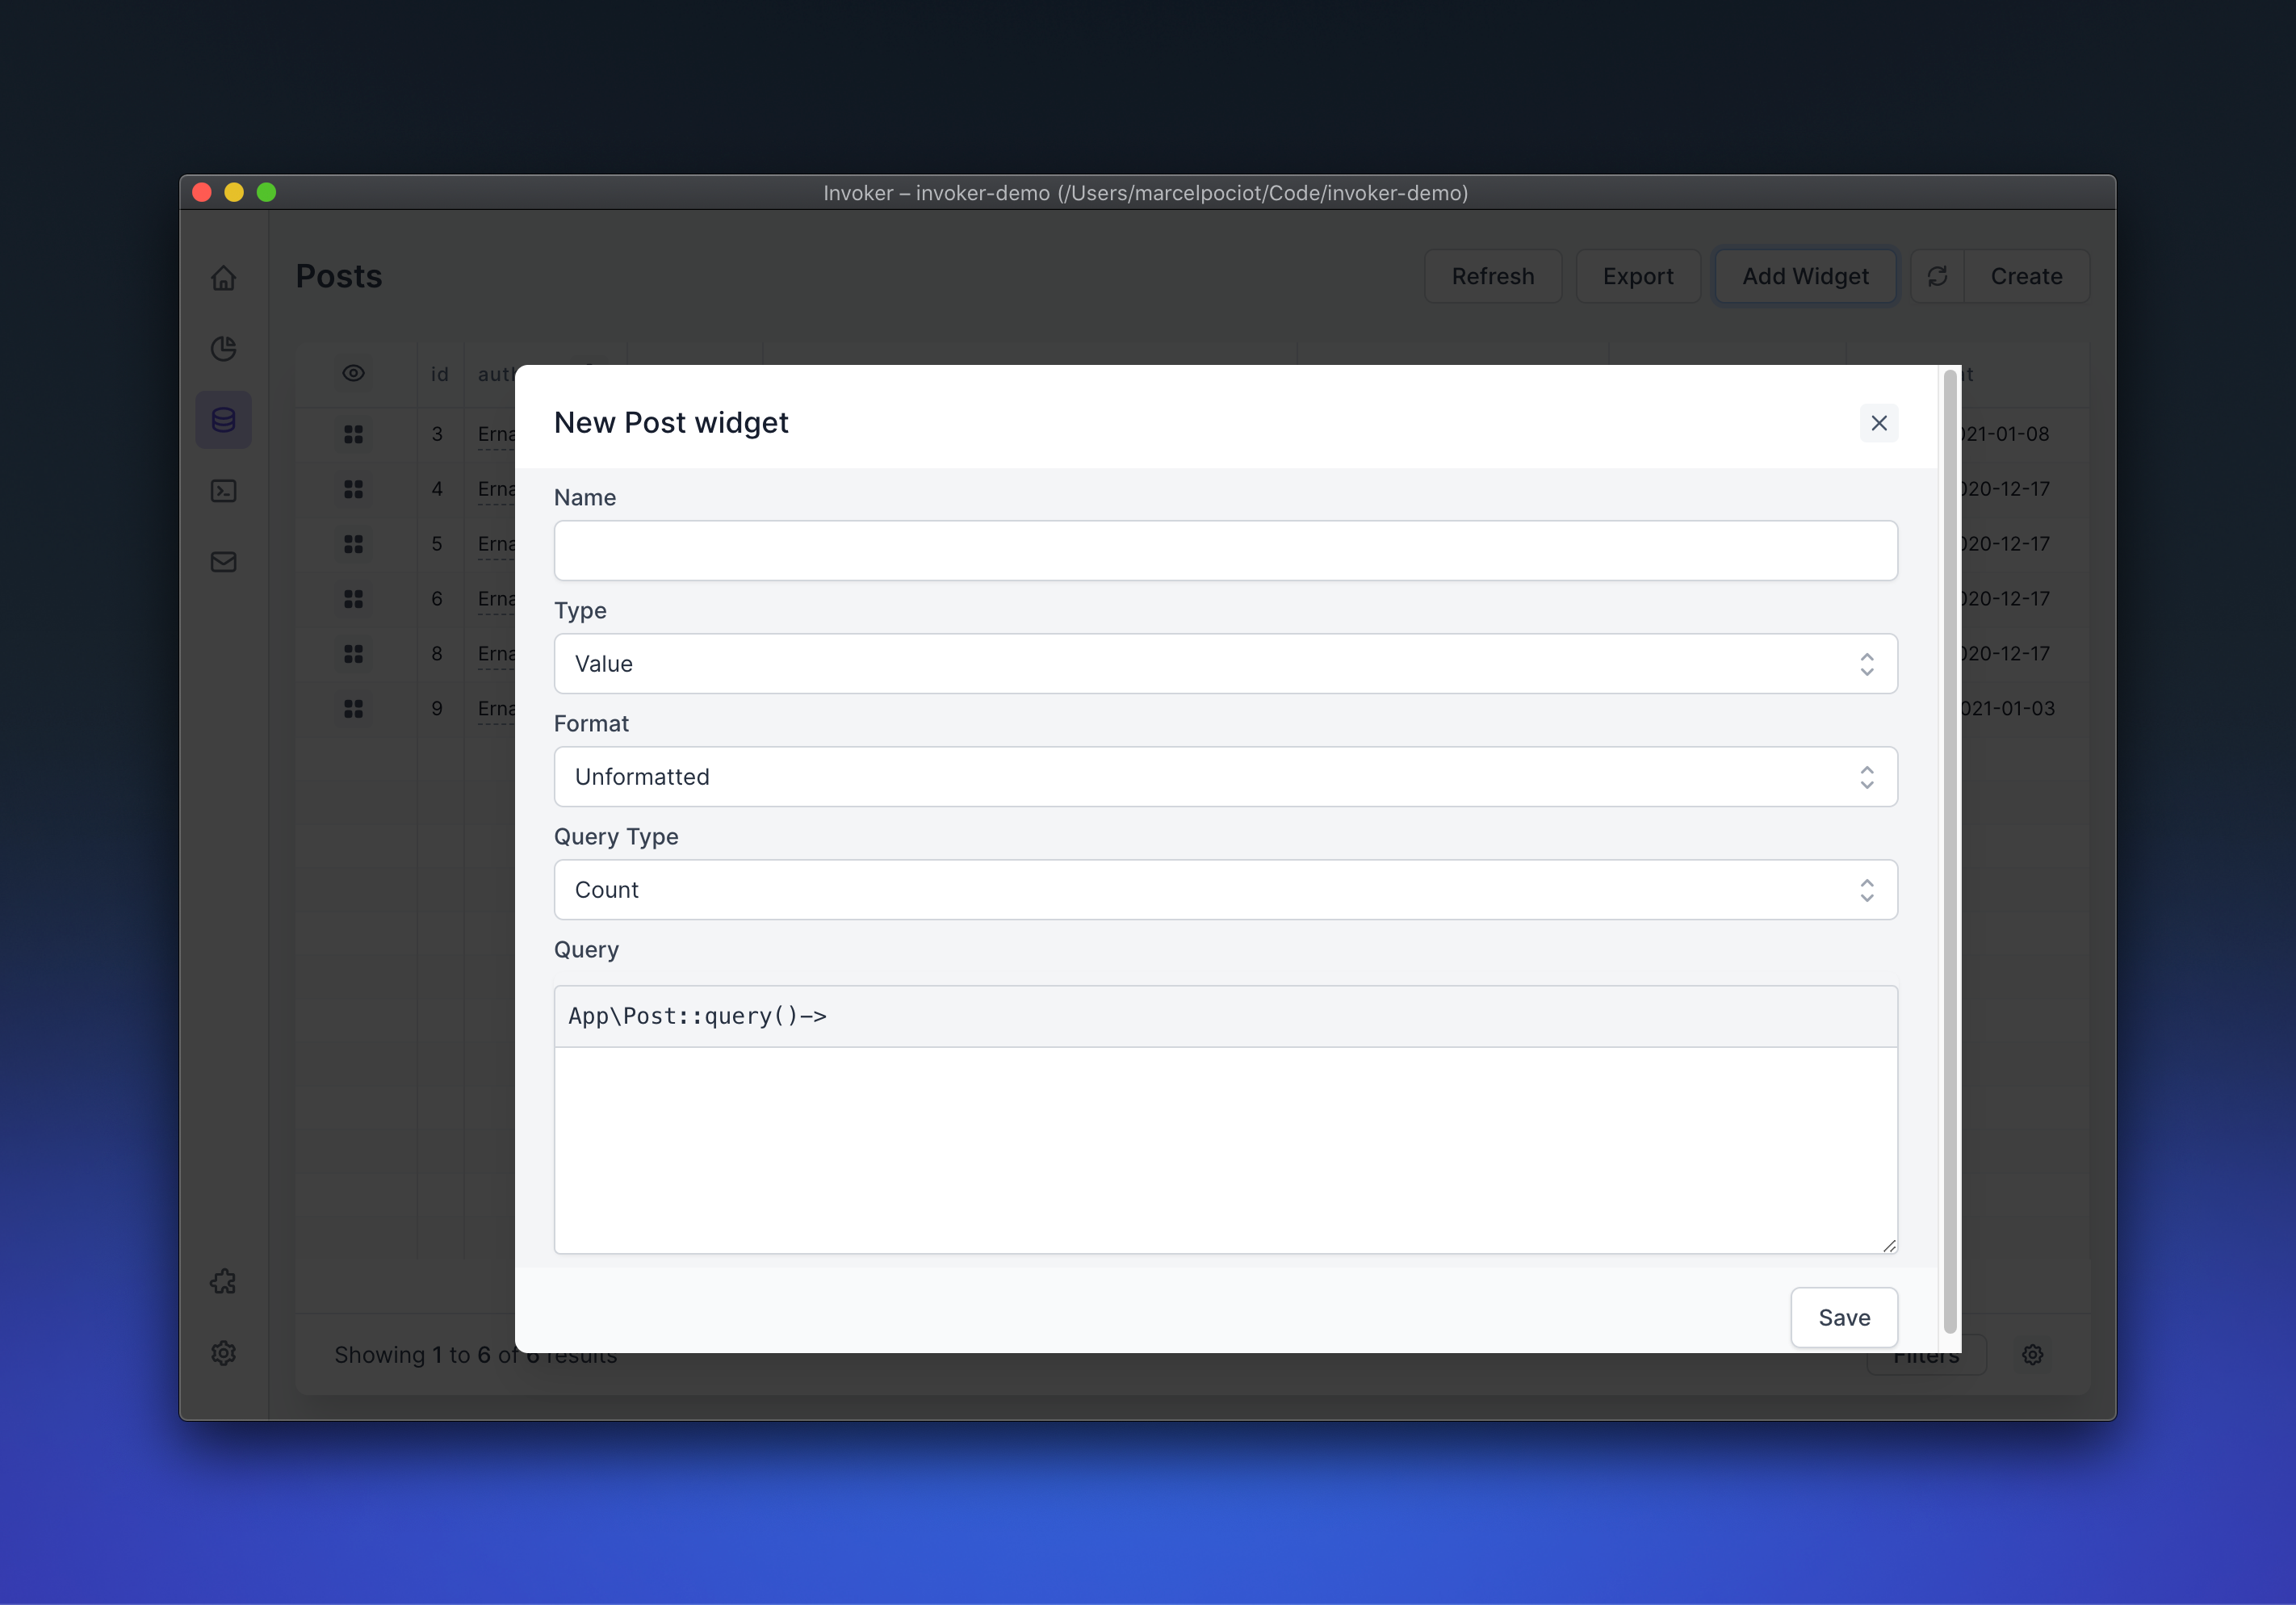
To define a widget, you first have to give the widget a name. This name will be the title of your widget once it is saved and visible.
Next you need to specify which kind of widget you want to create. This could either be a "Value" or "Trend" widget.
Value Widgets#
A value widget is a widget that displays a value in a variety of different formats. This could be the sum of all users in your database, the total sum of all orders that have been placed in the last 7 days, or a completely customized result - such as a dynamic string.
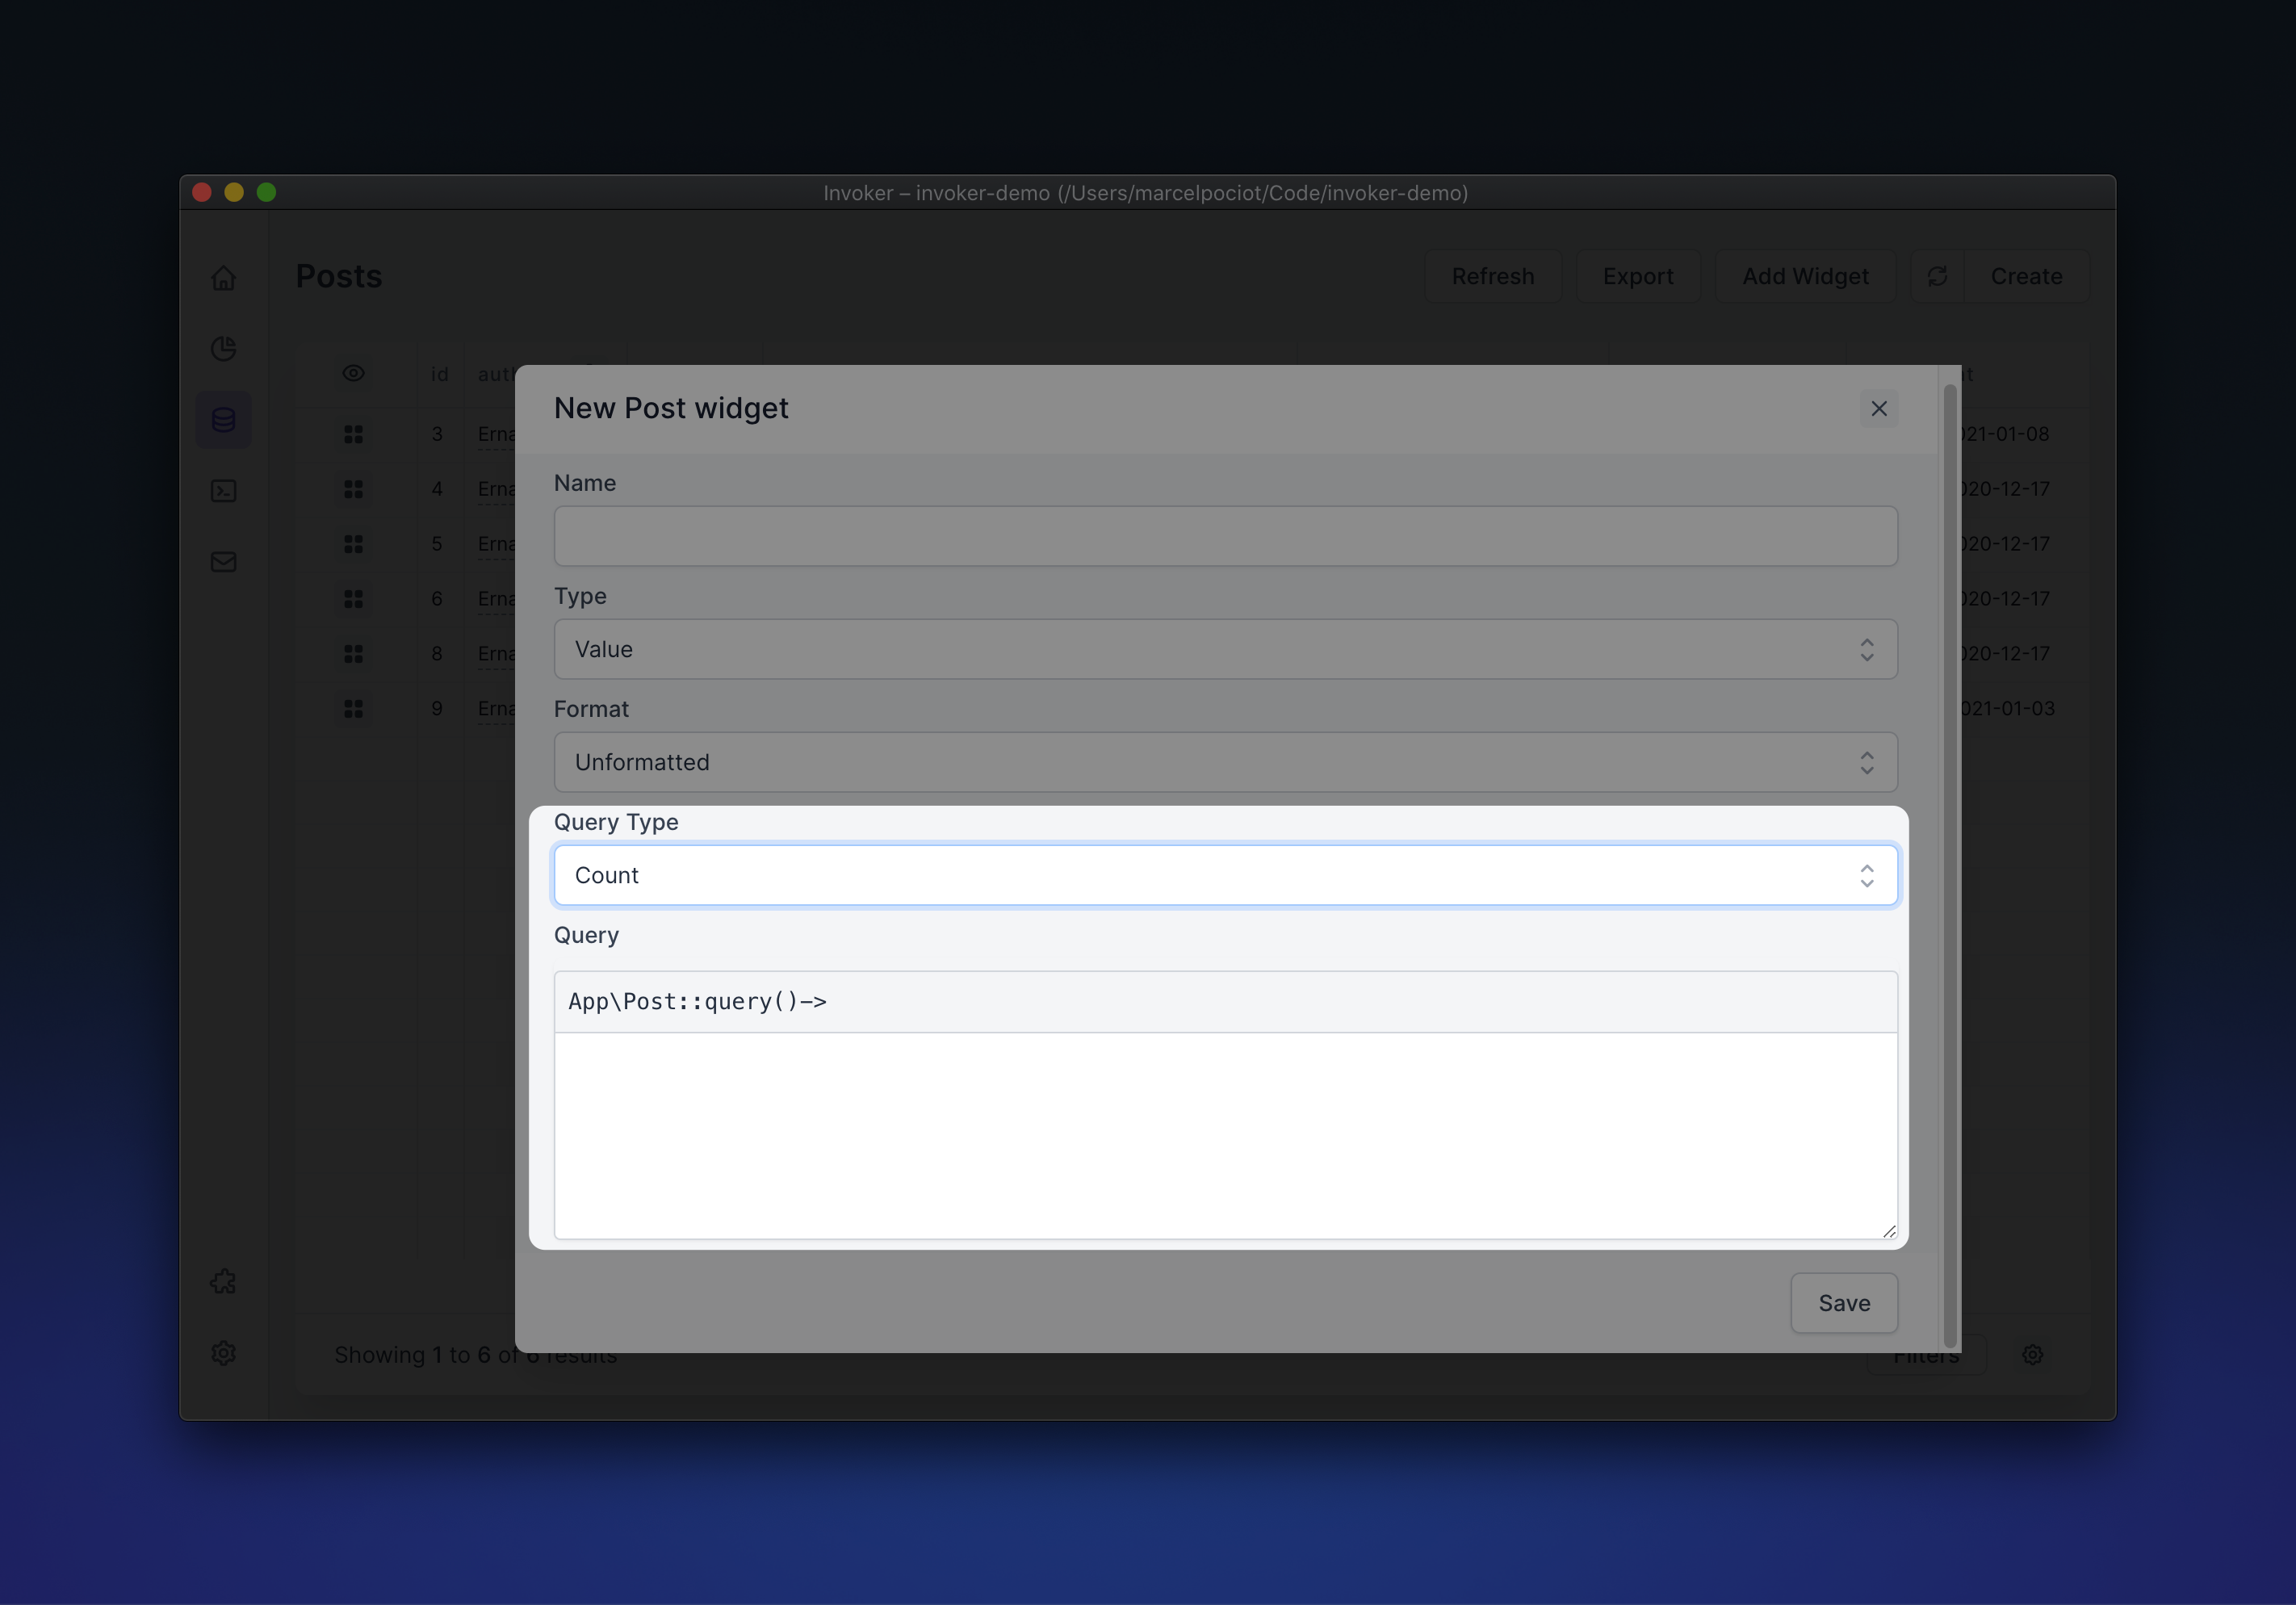
Query Types#
When creating a value widget you can choose between different query types. This determines how the value will be calculated behind the scenes.
The available query types are:
Count
Counts the selected model. You can customize the eloquent query that should be applied when the models get counted.
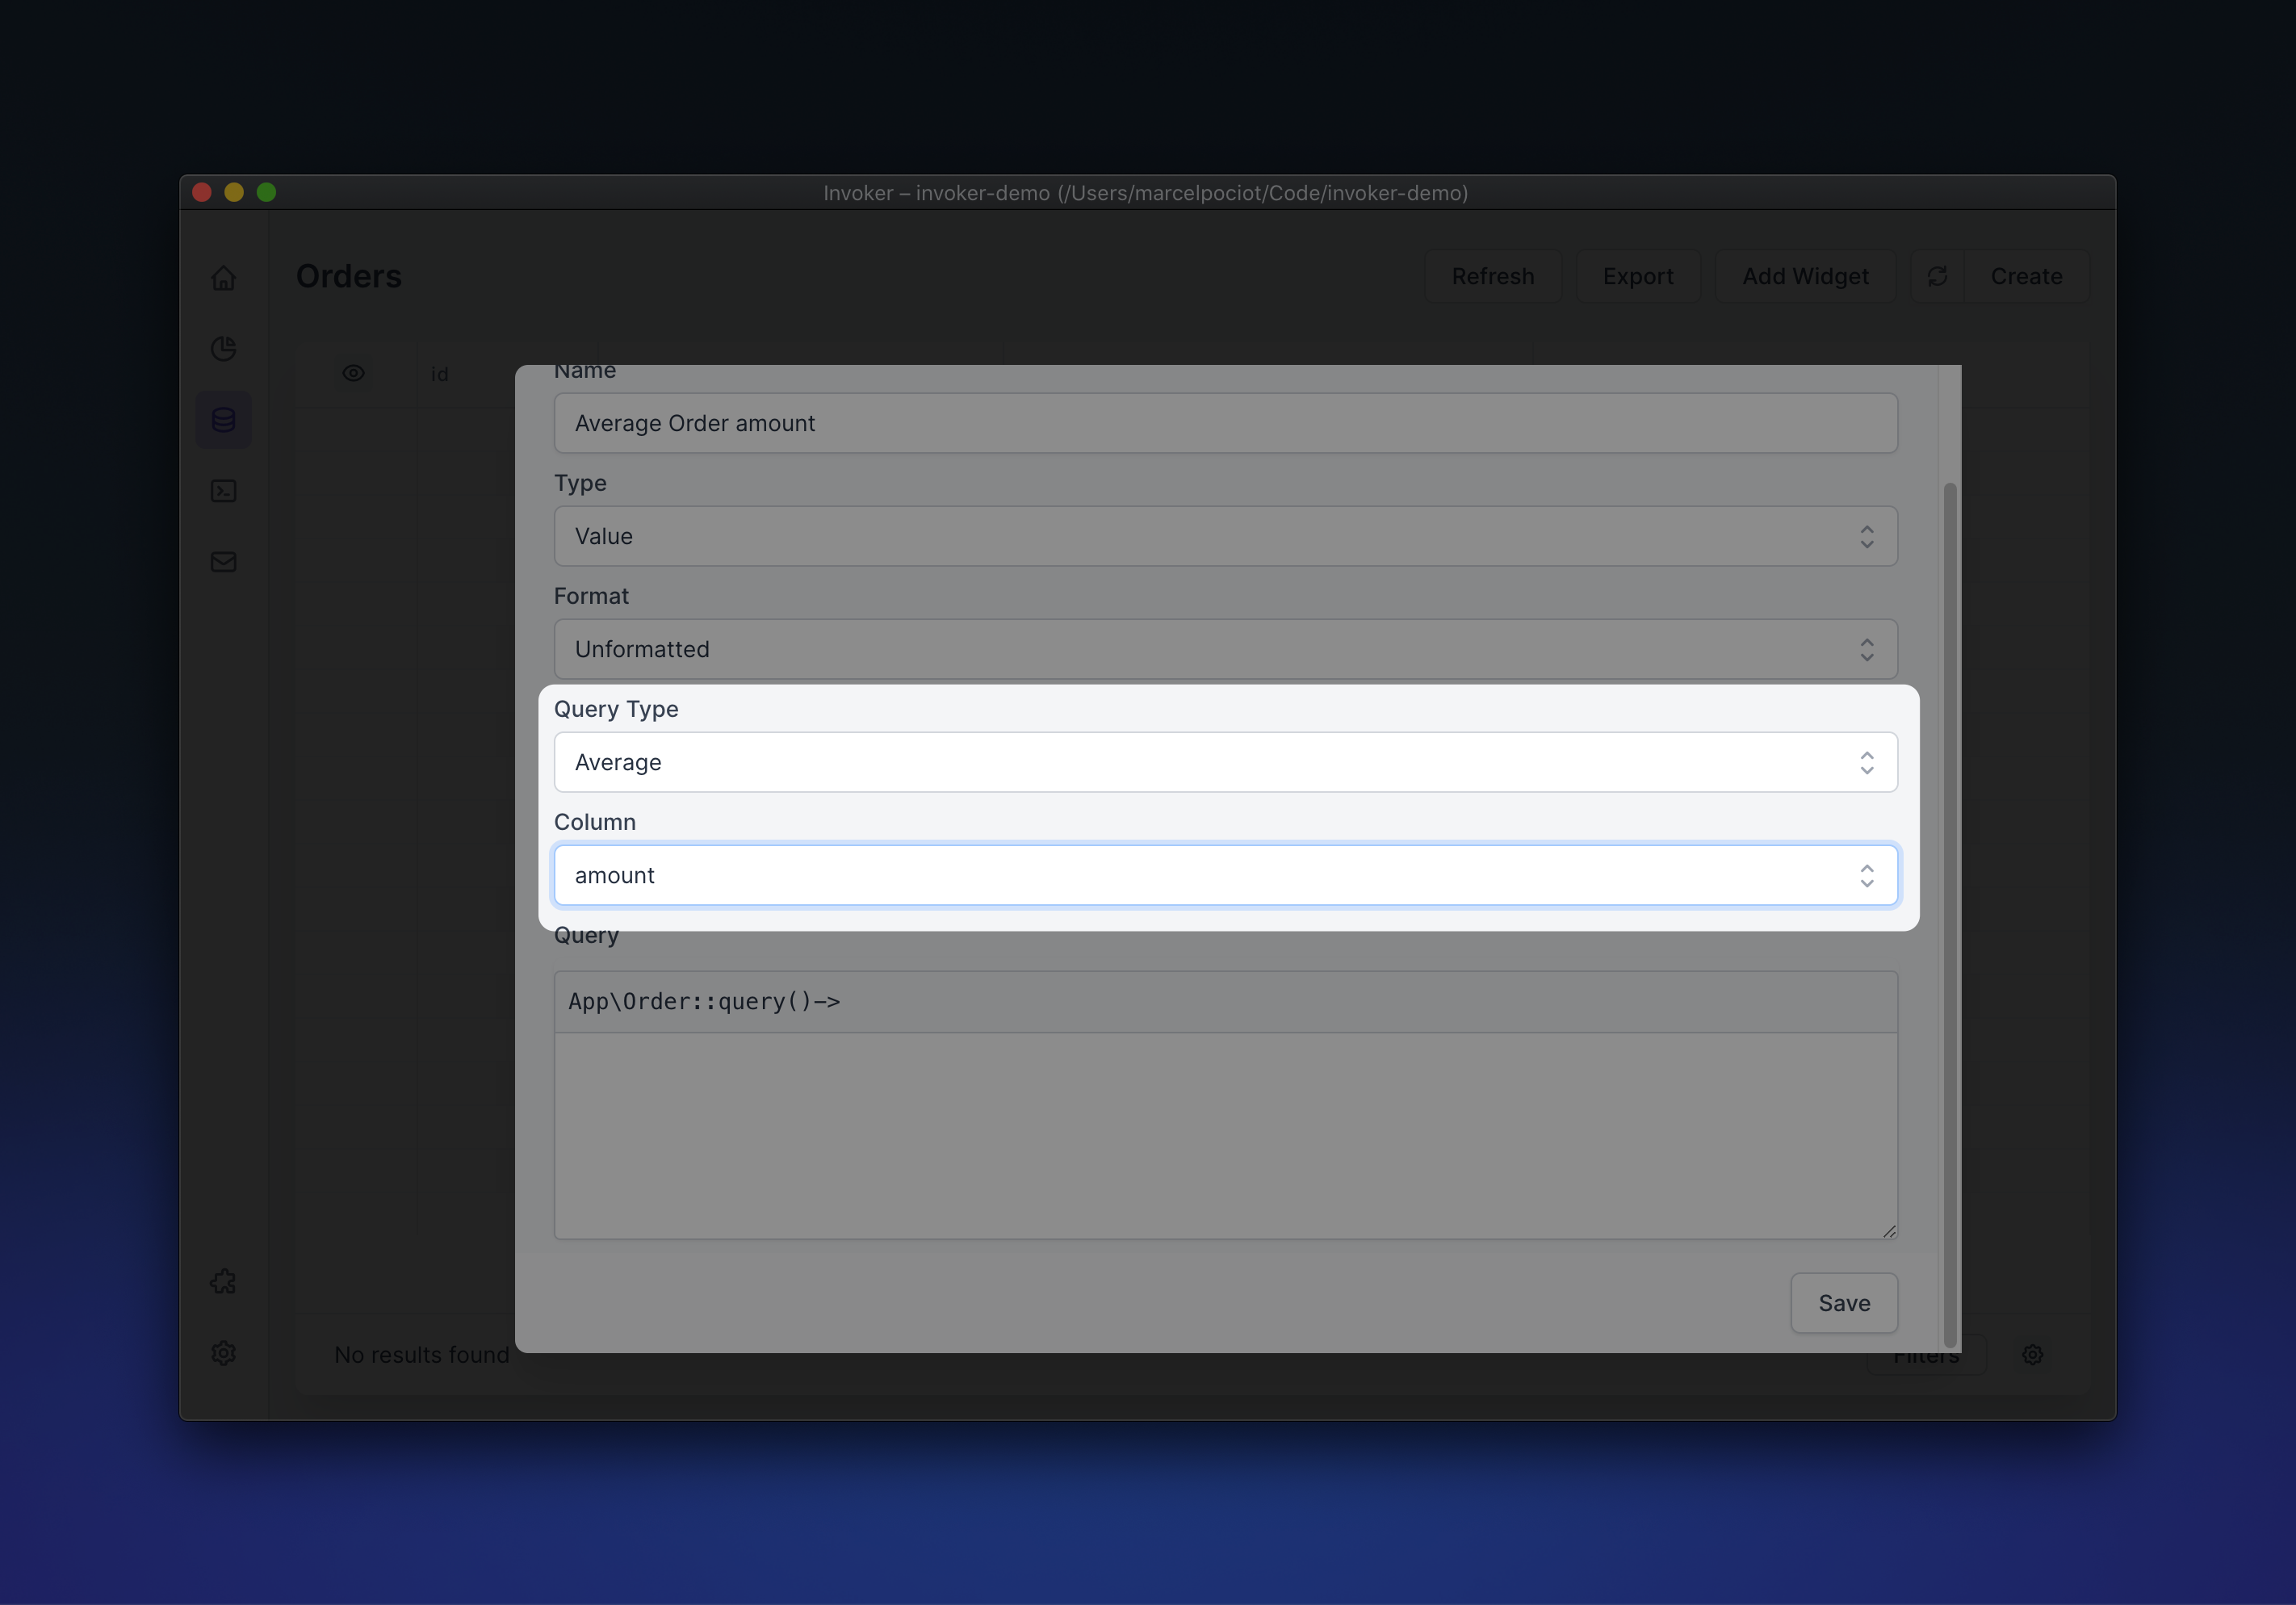
Average, Sum, Min, Max
Takes the average, sum, minimum, or maximum amount found across the specified column on the selected model. The column can be selected from the drop down menu, giving you all available columns found in the model table. In addition to this, you can also specify "custom", which allows you to provide a custom column name/query to use for the calculation.
You can customize the eloquent query that should be applied when the models value gets calculated.
Custom
The custom query type allows you to completely customize the result that should be visible on the widget. You can evaluate any kind of PHP code and the resulting value will be visible on the widget.
Formatting#
You can format the widget result in a number of ways. Under the hood, Invoker is using Numeral.js to format the results.
You can choose between the following format presets:
- Number
- Currency
- Unformatted
- Custom
The Custom format allows you to set a custom Numeral.js style formatting for the widget result.
Trend Widgets#
A trend widget is a widget that shows you a line chart for a specified period of time for the selected result. This could be something like the amount of models created per hour, day, week, etc. or you can customize the query.
You can choose the time range that you want to aggregate your results. This can be one of the following:
- Minutes
- Hours
- Days
- Weeks
- Months
The "range" then determines the amount of time you want to go back to filter the results. For example, you might set the range to "14" and the aggregation to "days", to get the results for the last 14 days.
Similar to the value widgets, you can specify the query type, column and customize the query to filter the results.
Editing Widgets#
Once your widgets are saved, they will be accessible on the model index page. You can edit a widget at any given time, by hovering over it. This will show you the context menu for the highlighted widget. There you can choose to edit the widget again. Clicking this, will bring up the modal where you can customize the widget settings.
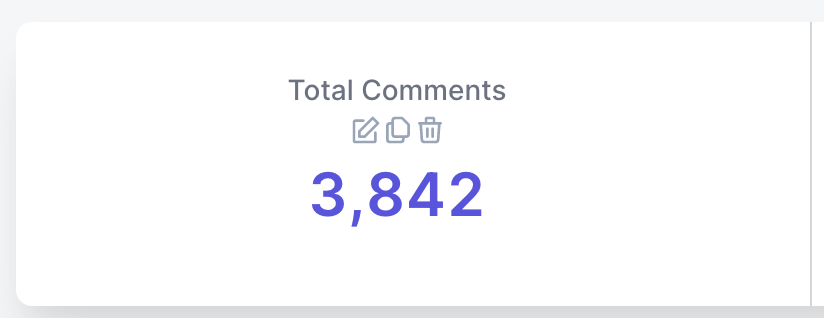
Duplicate Widgets#
Sometimes when creating widgets, you might want to duplicate an existing widget and customize it in order to save time when creating a new widget. To duplicate one of the existing widgets, hover over it and press the duplicate/copy button. A modal will open up with the duplicated widget. Feel free to customize the widget in here.
Deleting Widgets#
To delete an existing widget, hover over the widget and press the "delete" button.
Sharing Widgets with your team#
When you have created the widgets for one or multiple of your modals, you might want to share those widgets with other people in your team so that they do not need to recreate them in their own system.
This can be enabled, by turning on the "persist settings in project directory" option in the global Invoker settings. Read more about this in the settings documentation.